Customize Snapshot Inputs
WeatherCitizen Snapshot input fields can be customized to record whatever is important to you, such as specific animal sightings, water quality indicators, or technical notes. Input forms can be easily shared on or offline to enable consistent data inputs across multiple devices.
This section will describe how to customize and share the Snapshot input fields.
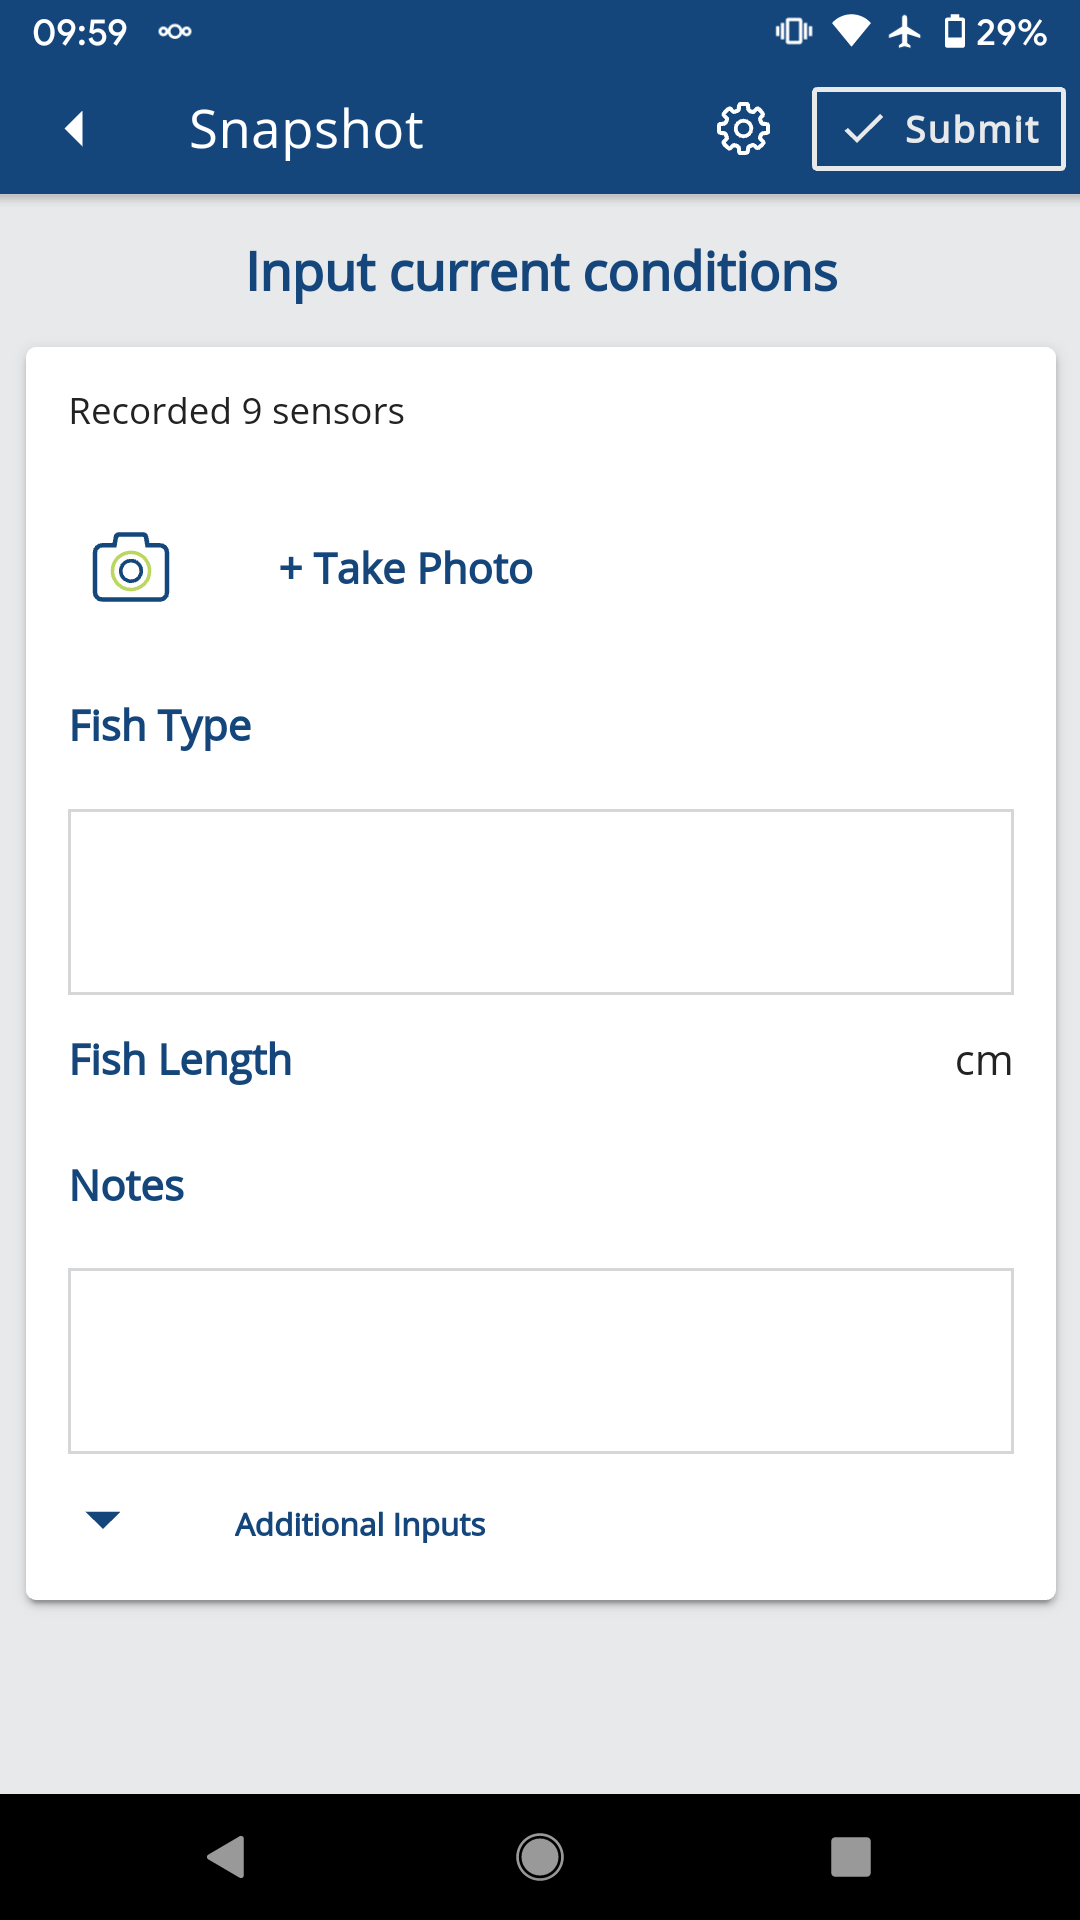
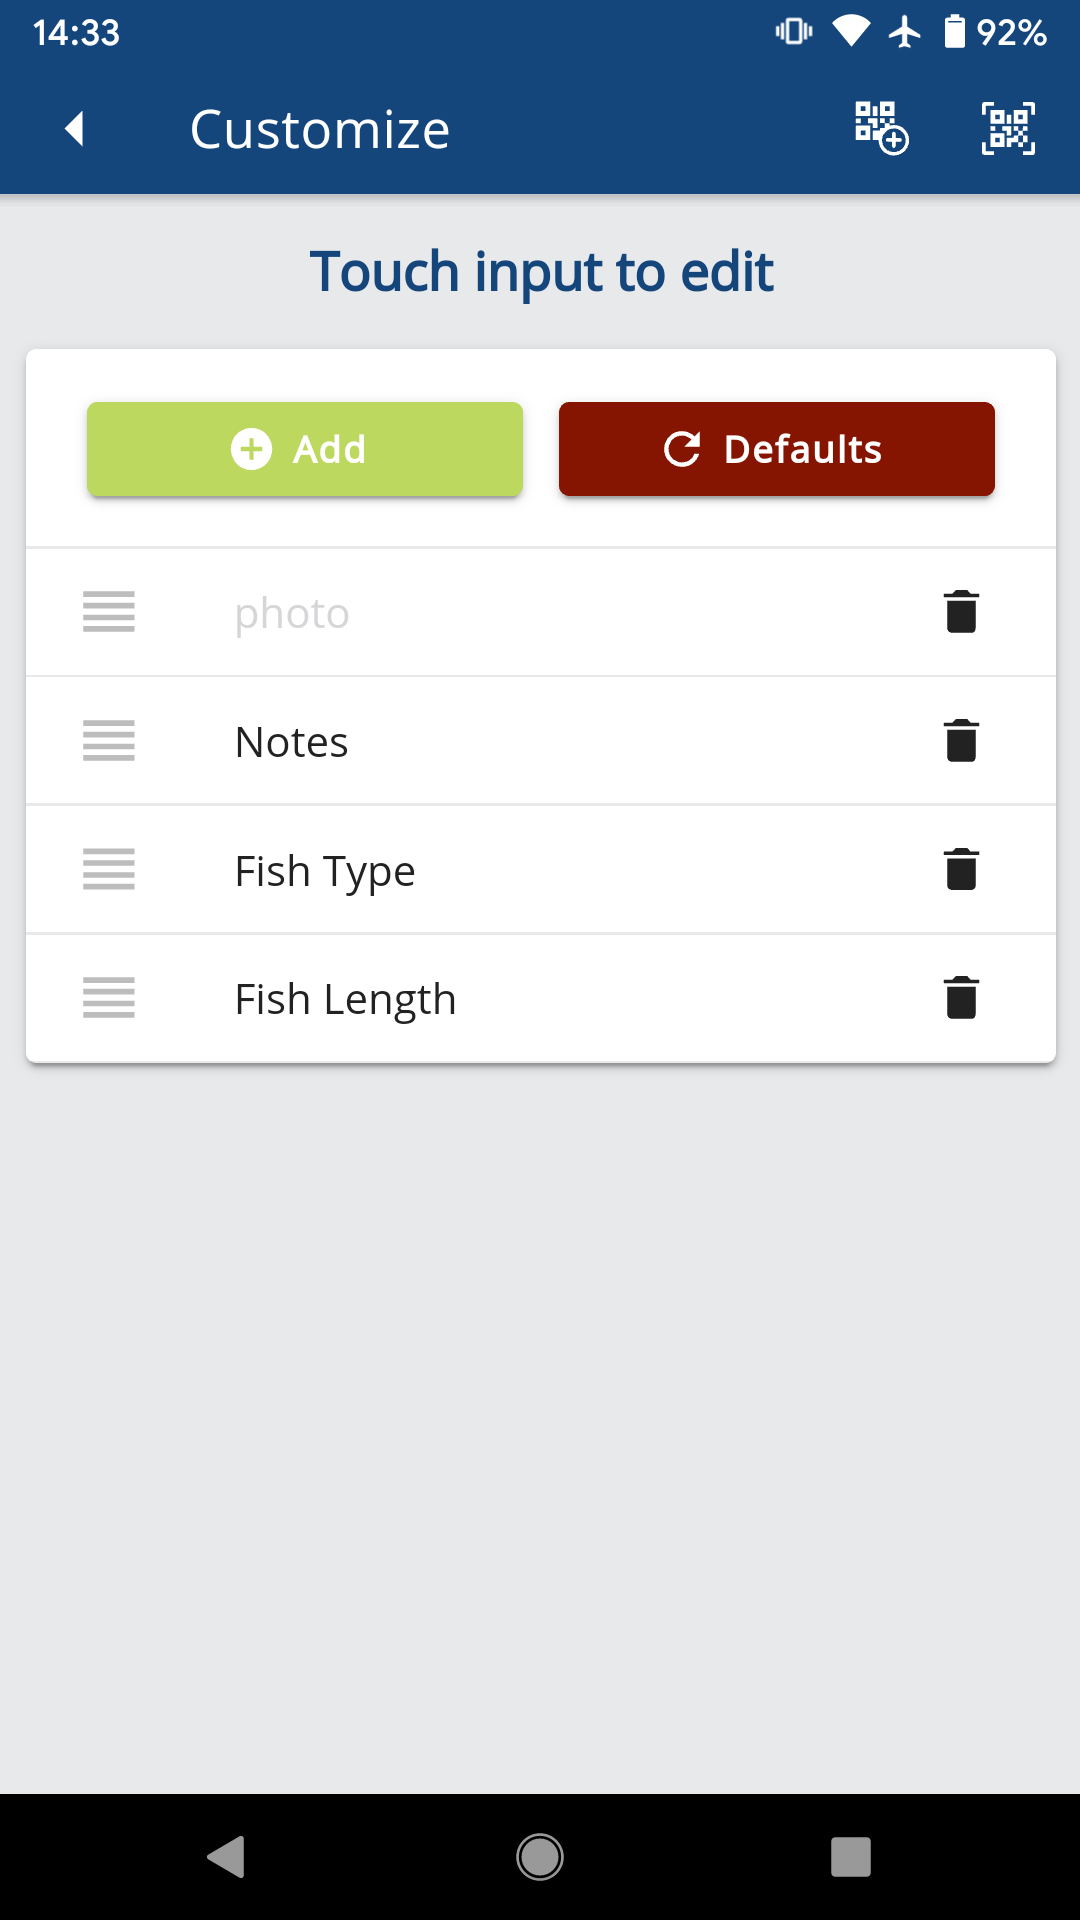
For this example, we will create a custom input form for tracking fish. The form will include a photo input, a text input for the fish type, a numeric input for the fish length, and a text input for notes.
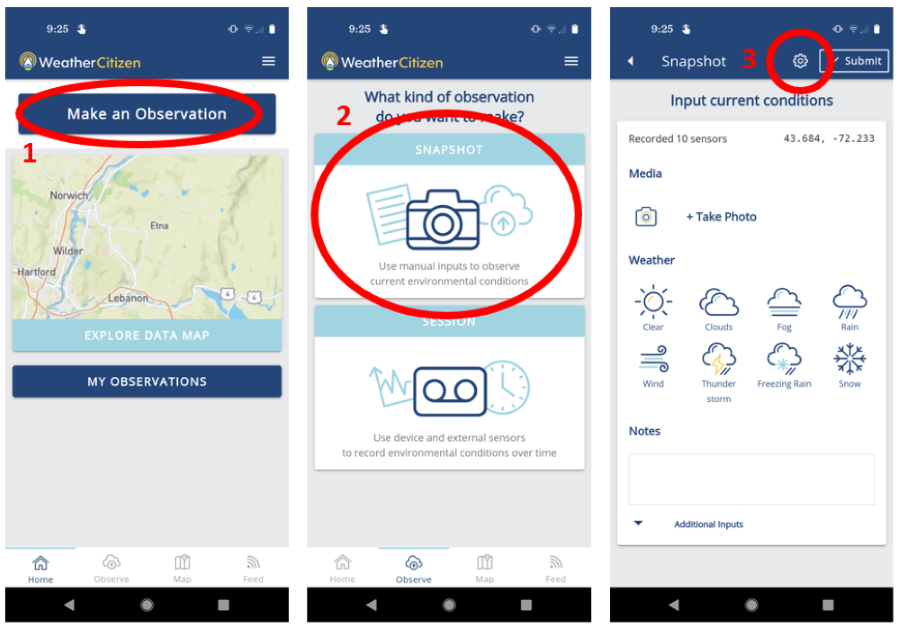
To get started, navigate to the Settings page and select the menu item Customize Snapshot Inputs.
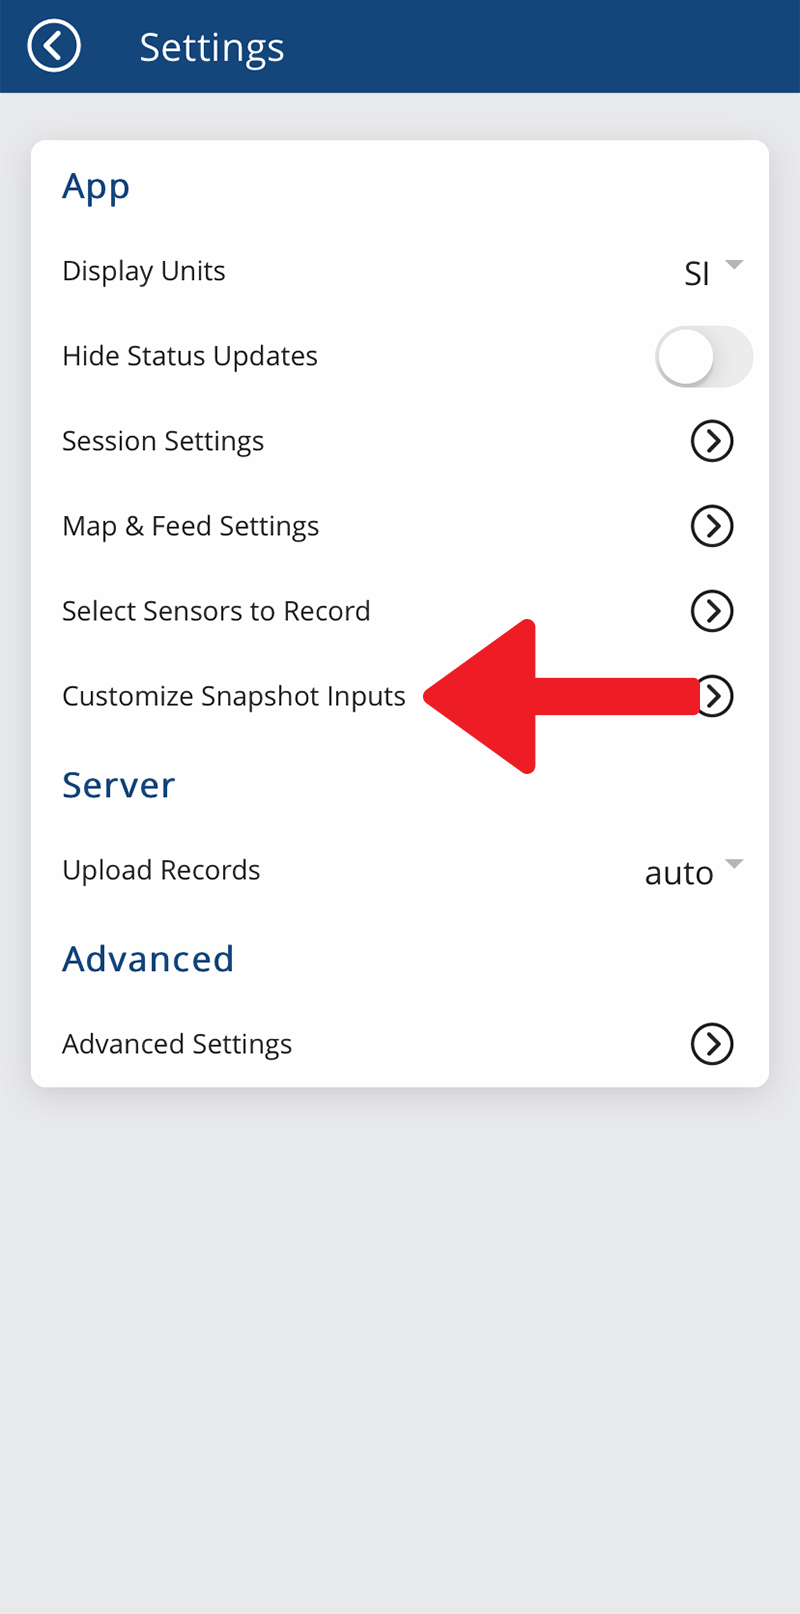
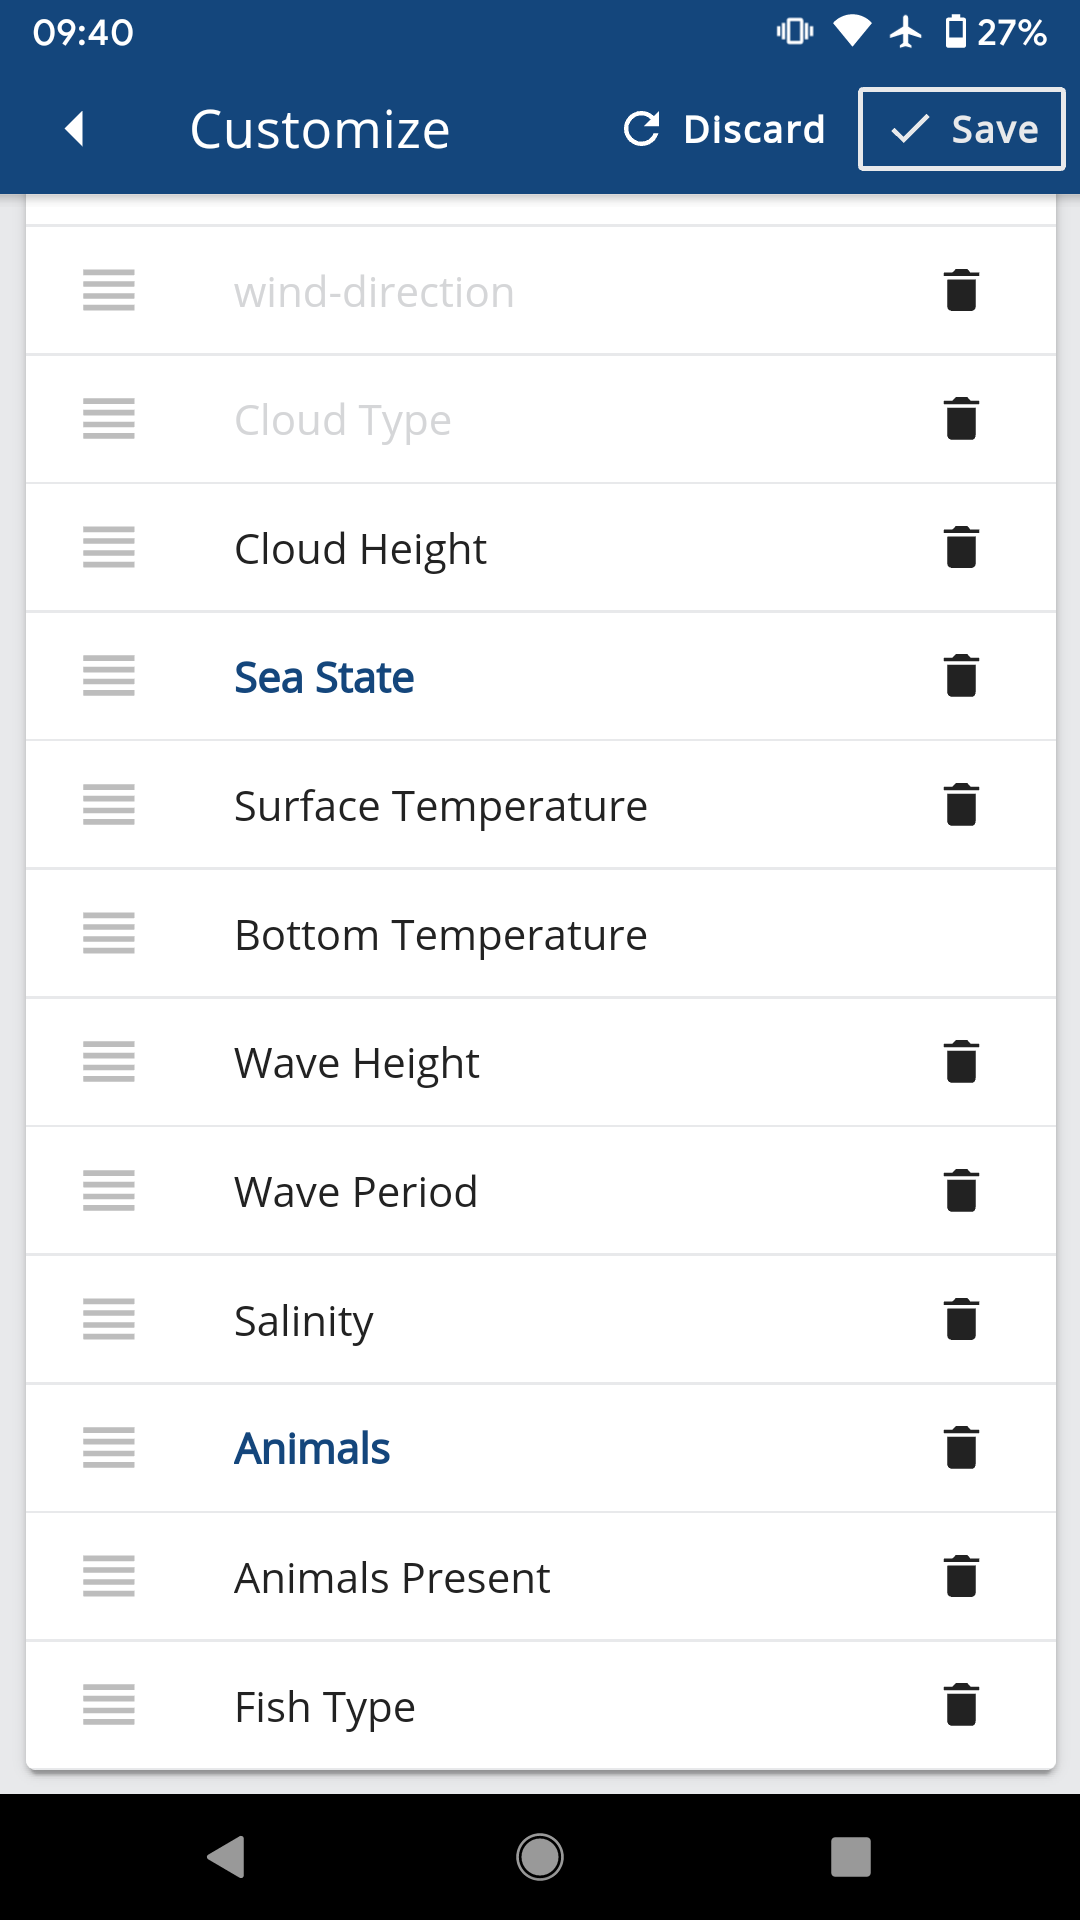
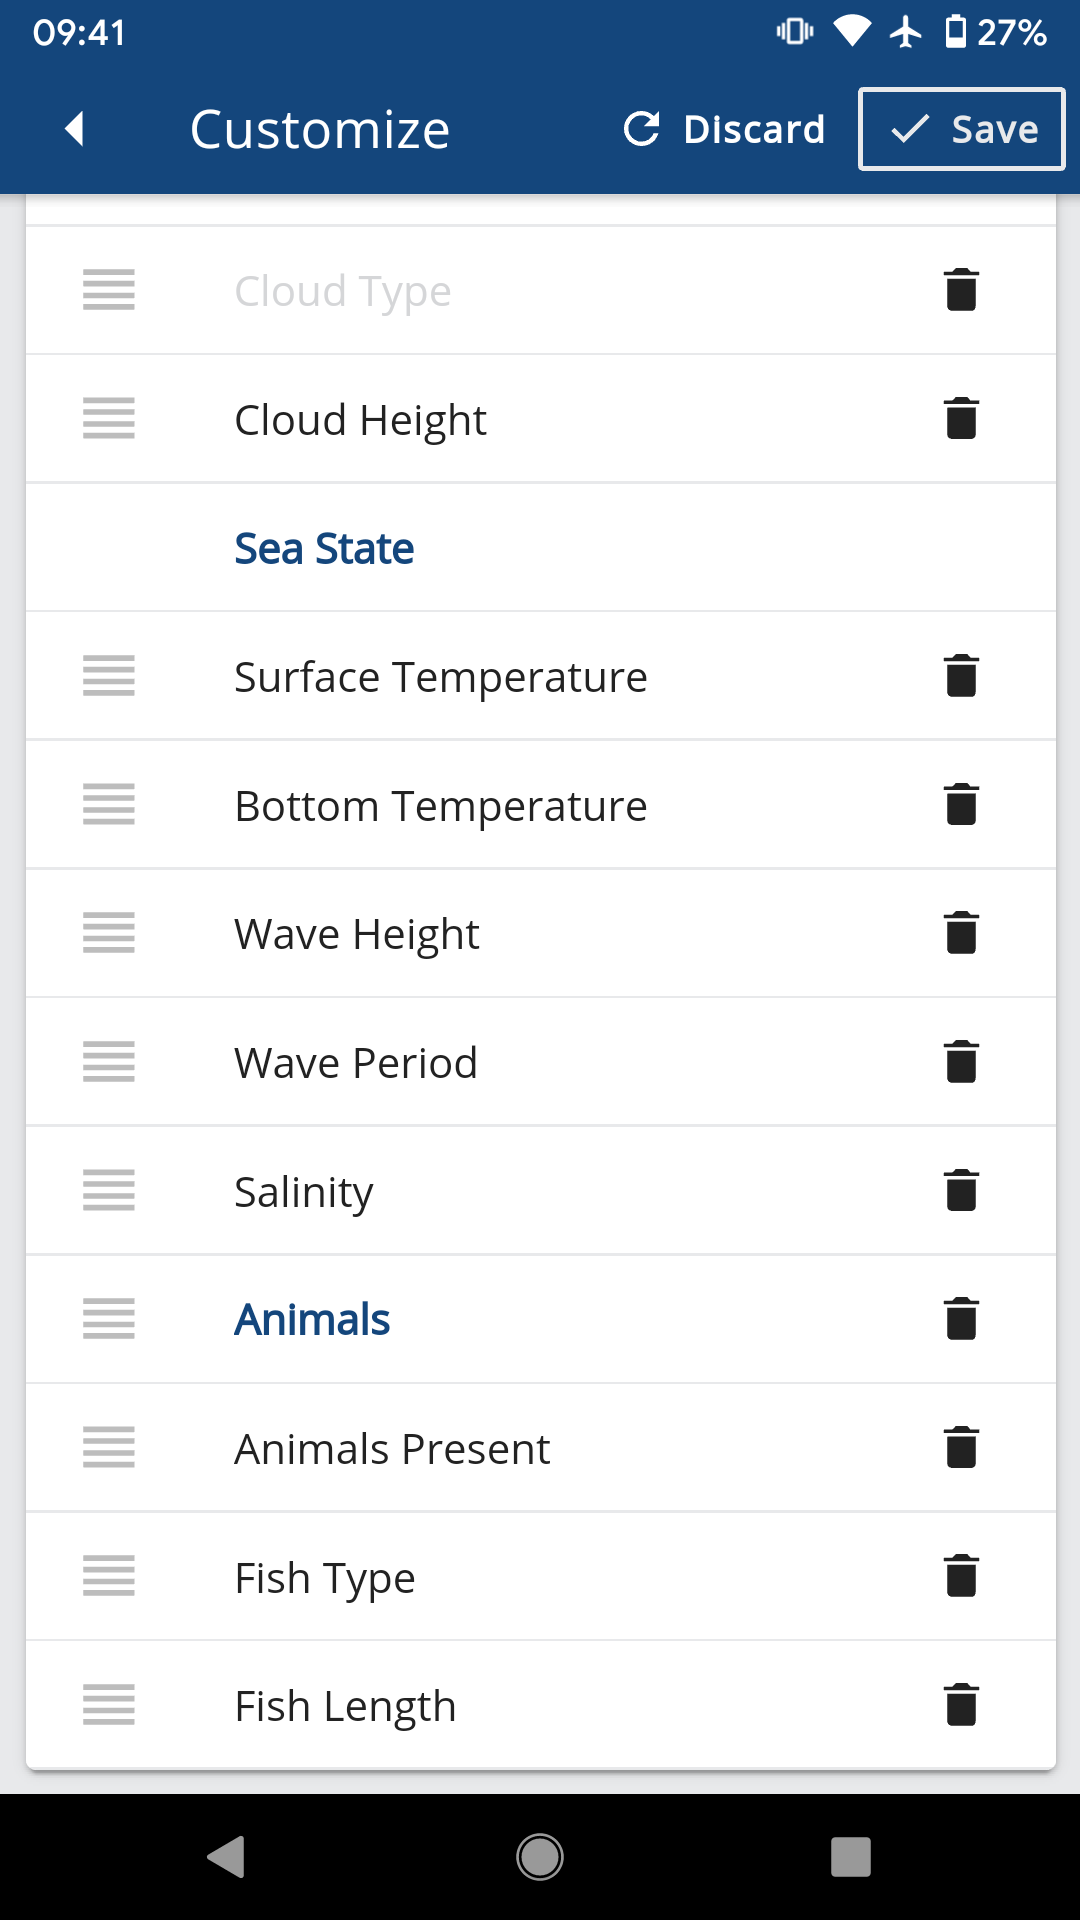
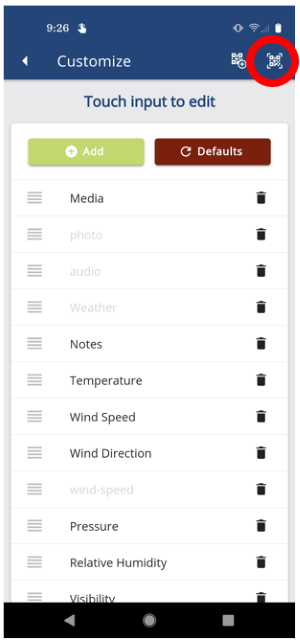
On this settings page, you will see a list of items representing features of the Snapshot Inputs page. Each item represents a type of input field or section label.
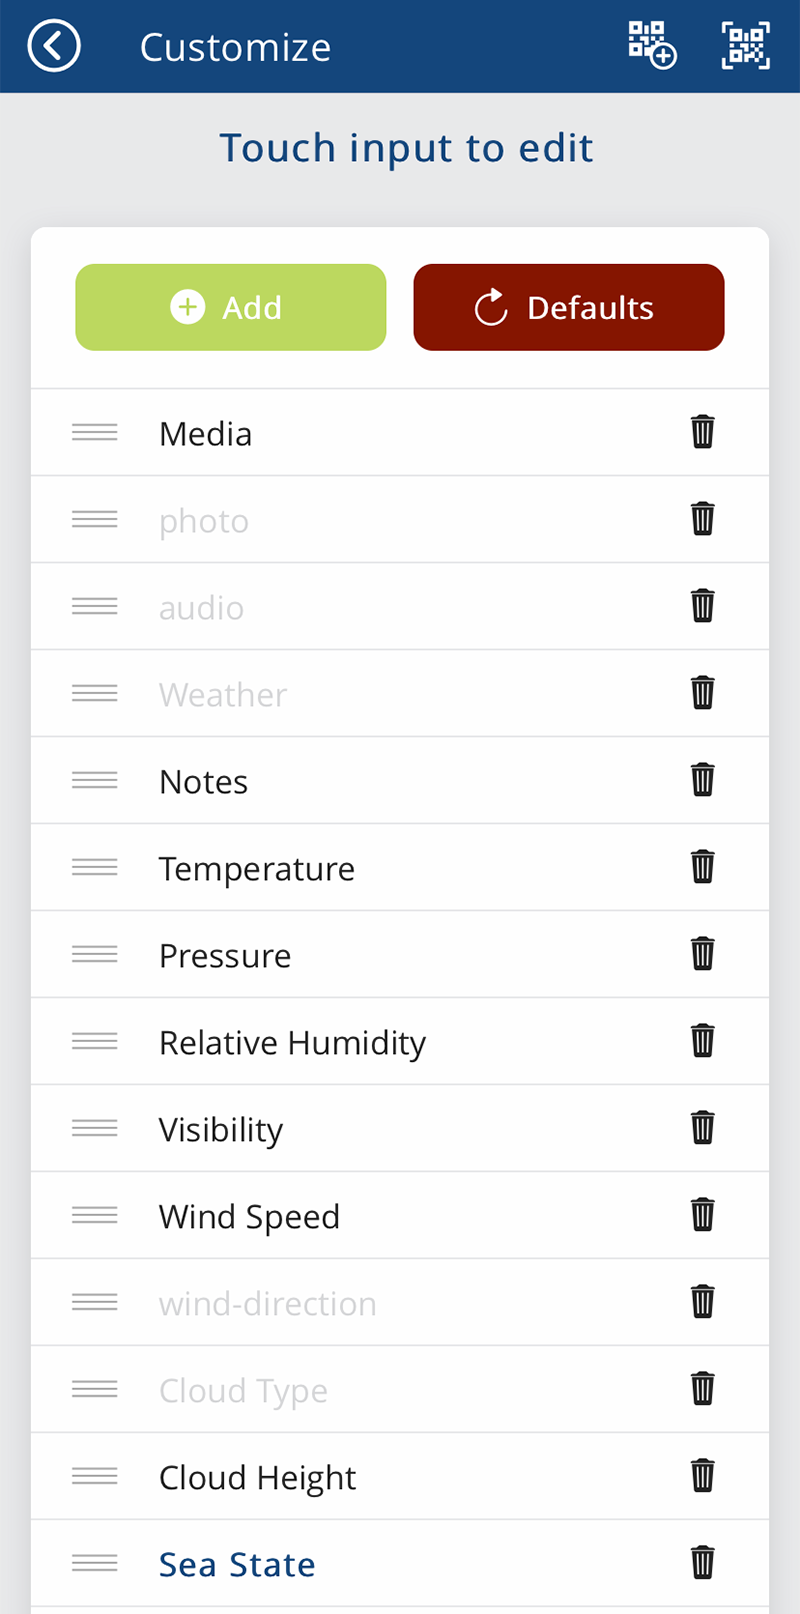
Add Input Fields
Press the green + Add button to open the new input field form.
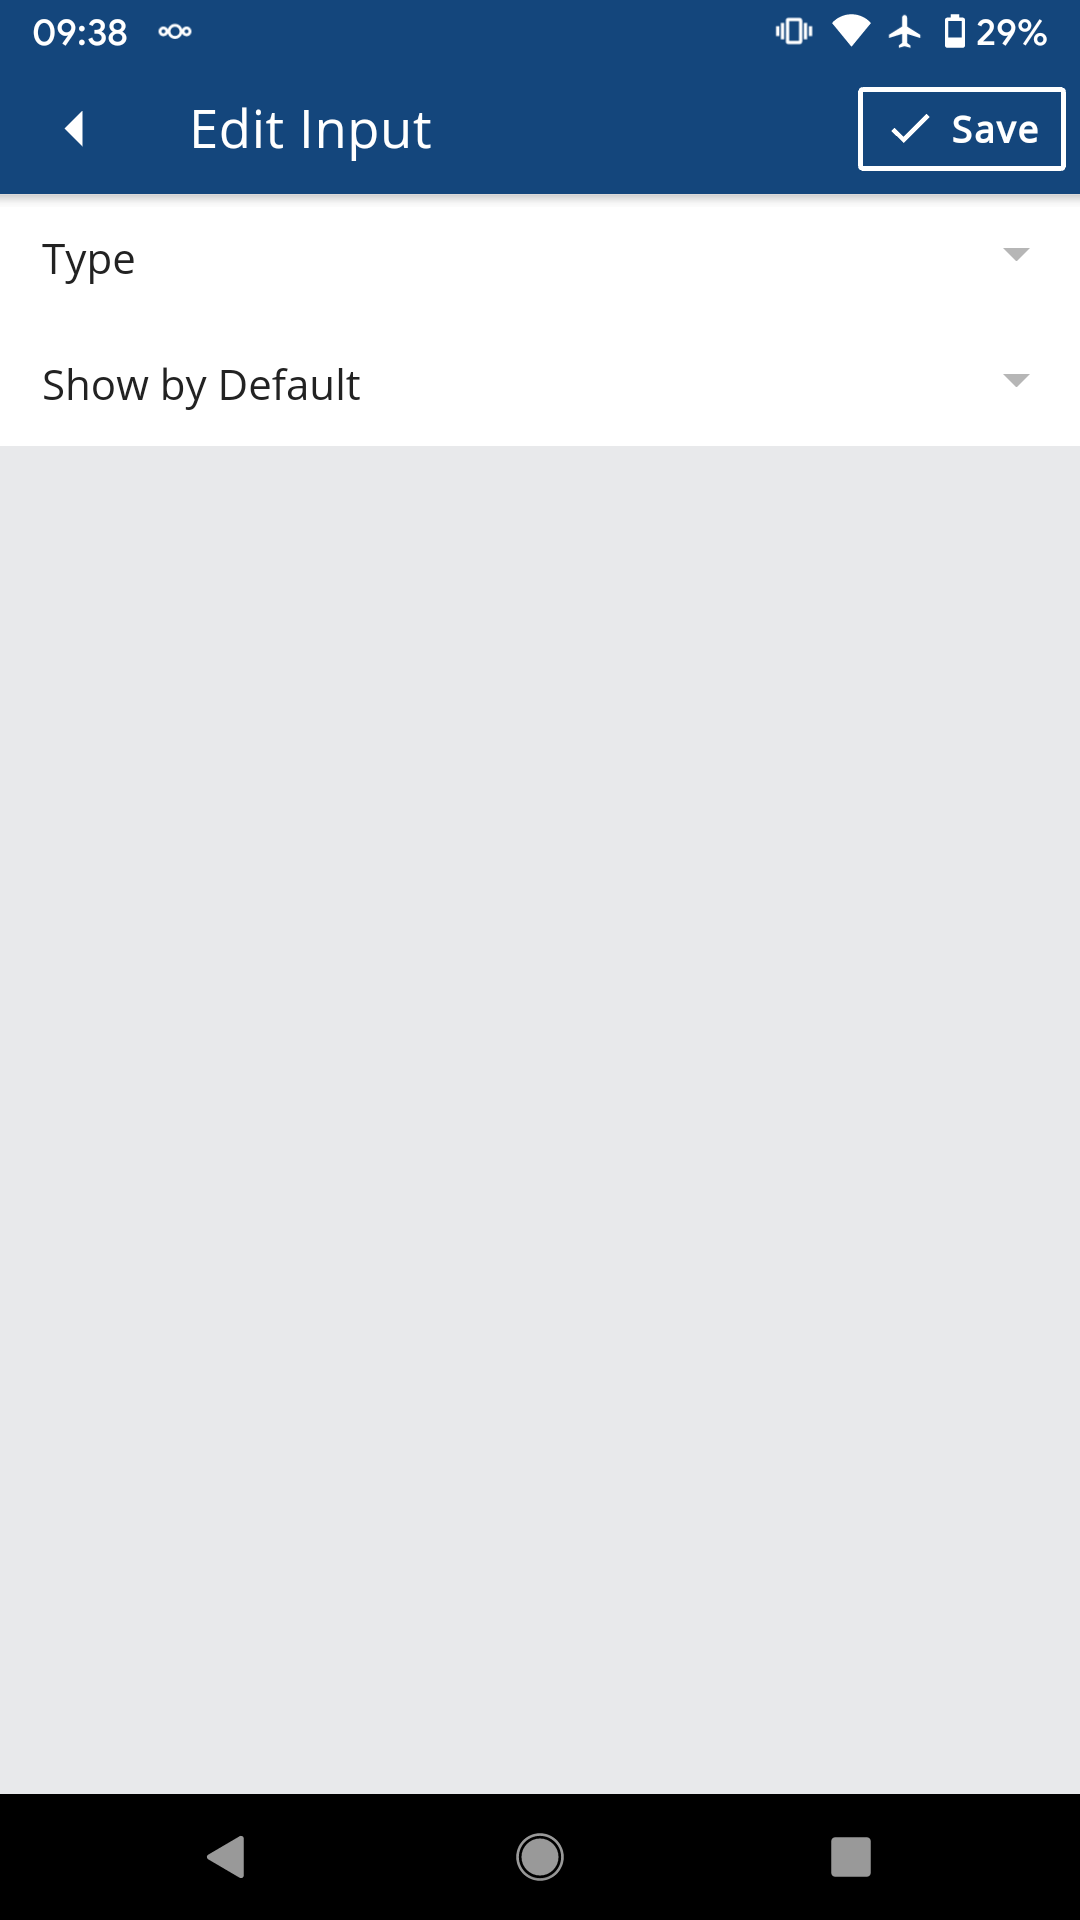
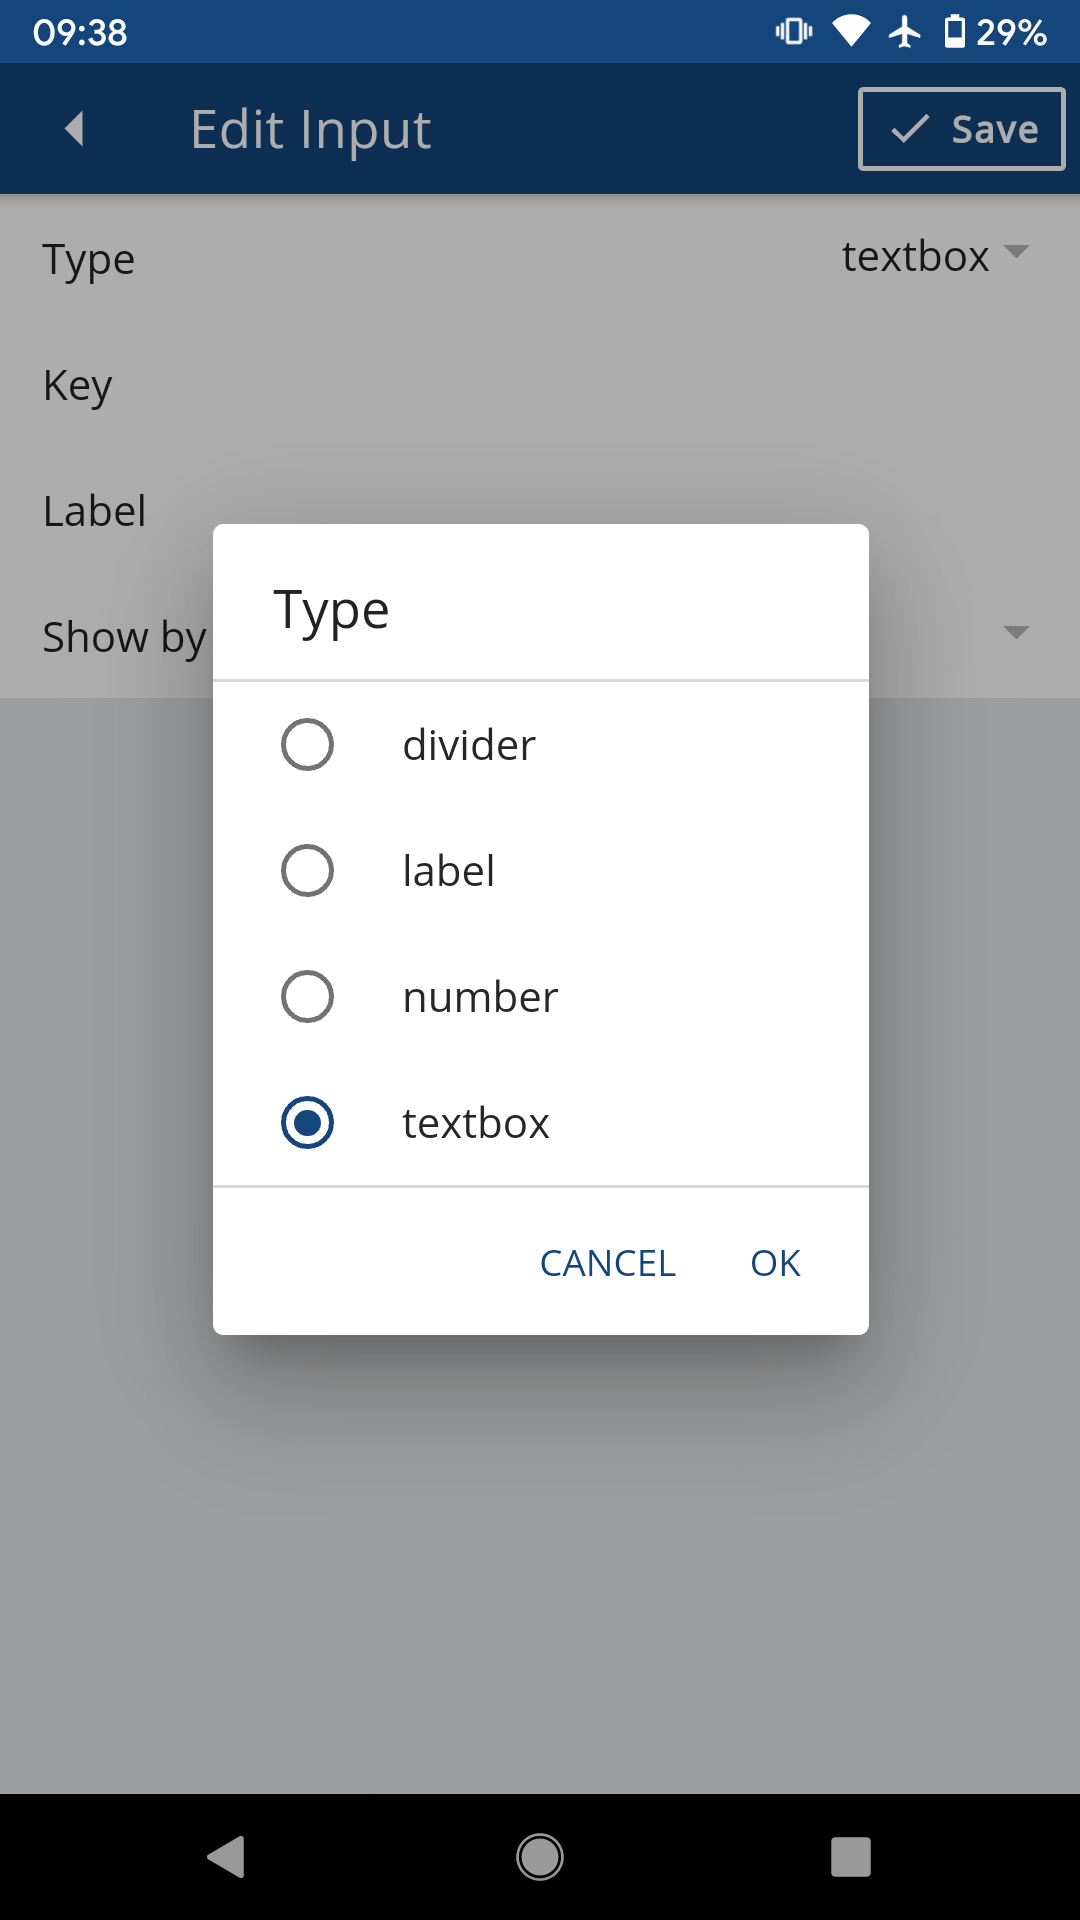
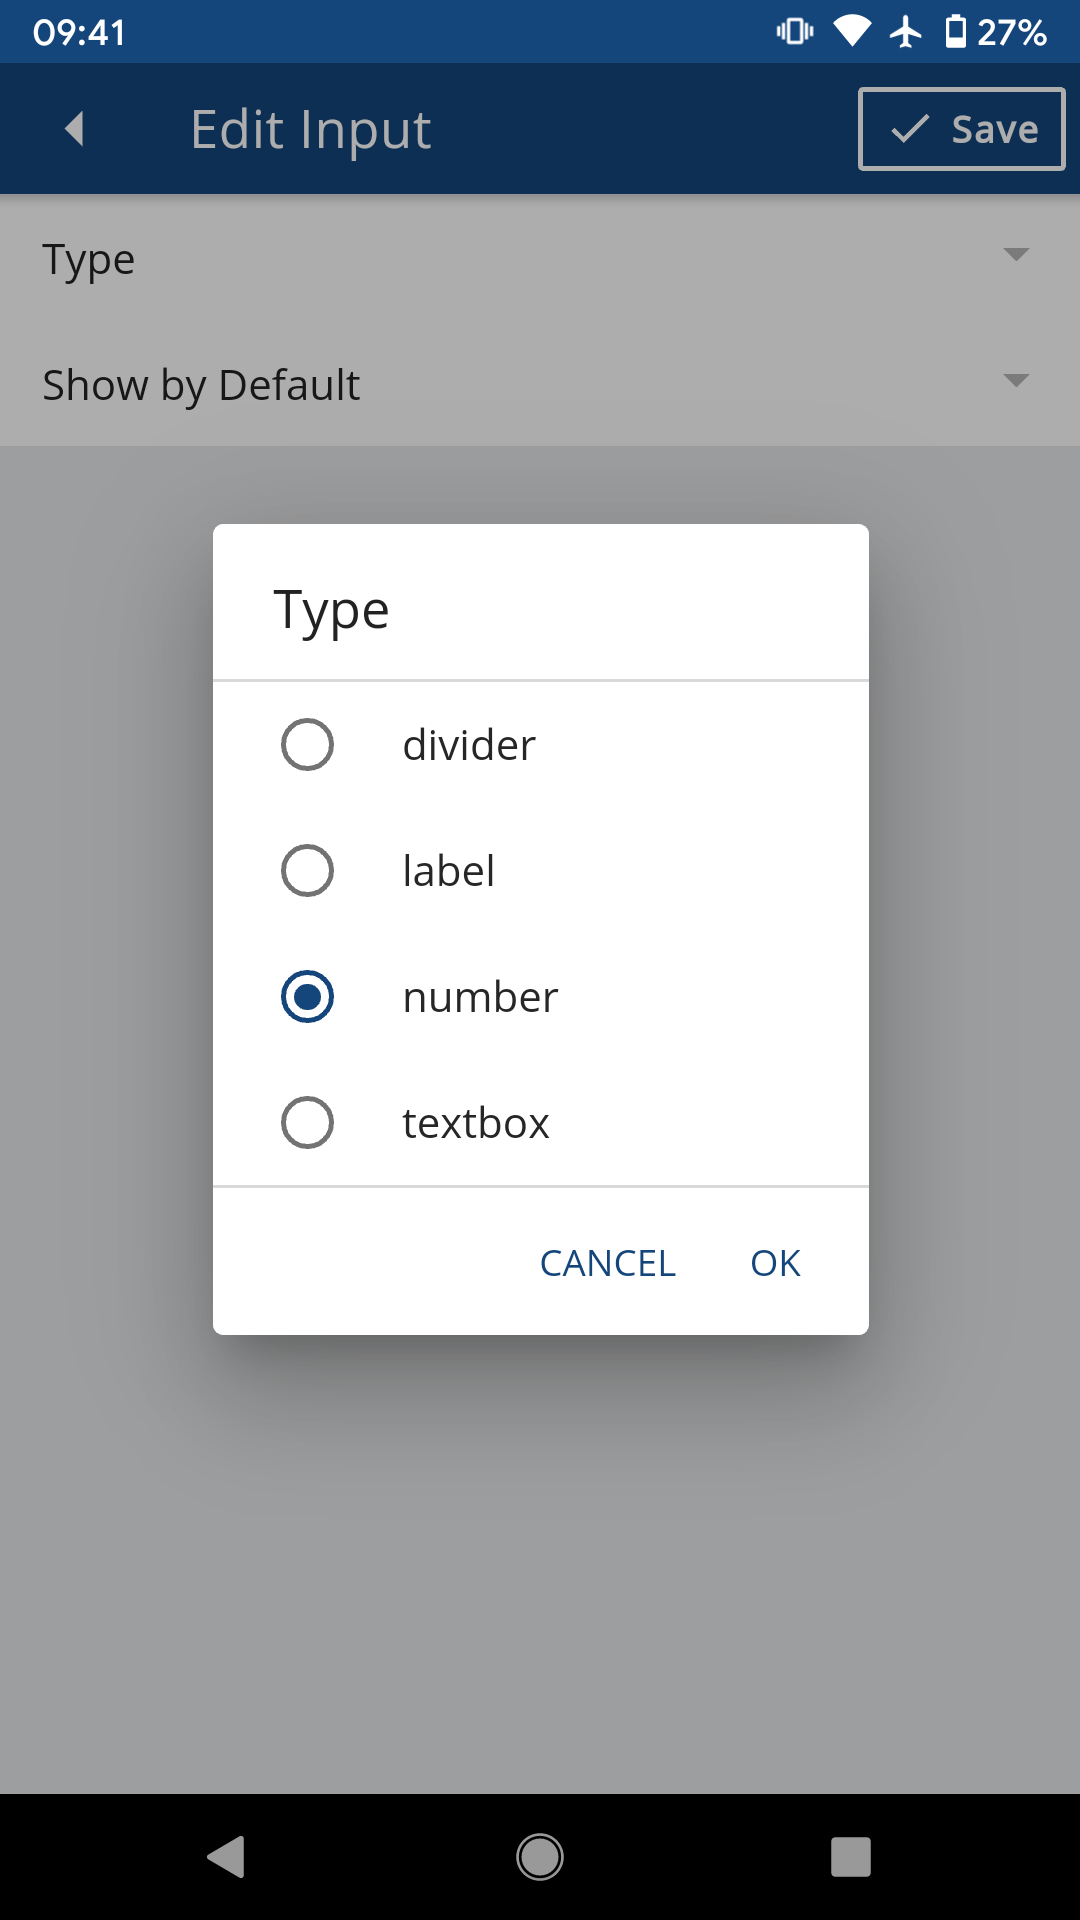
Click on the drop-down arrow in the Type field and select the type of input field.
- Divider: Header with a divider line underneath to separate sections of inputs. This input type is only a text banner and is not an input field.
- Label: Smaller header to label a section of inputs. This input type is only a text banner and is not an input field.
- Number: Input field for recording numerical data.
- Textbox: Input field for recording text.
- Photo: Input field to take photo through device camera. Only one photo input per Snapshot is supported.
- Audio: Input field to record audio through device microphone. Only one audio input per Snapshot is supported.
In this example, we’ll create a Textbox field to note a type of fish caught.
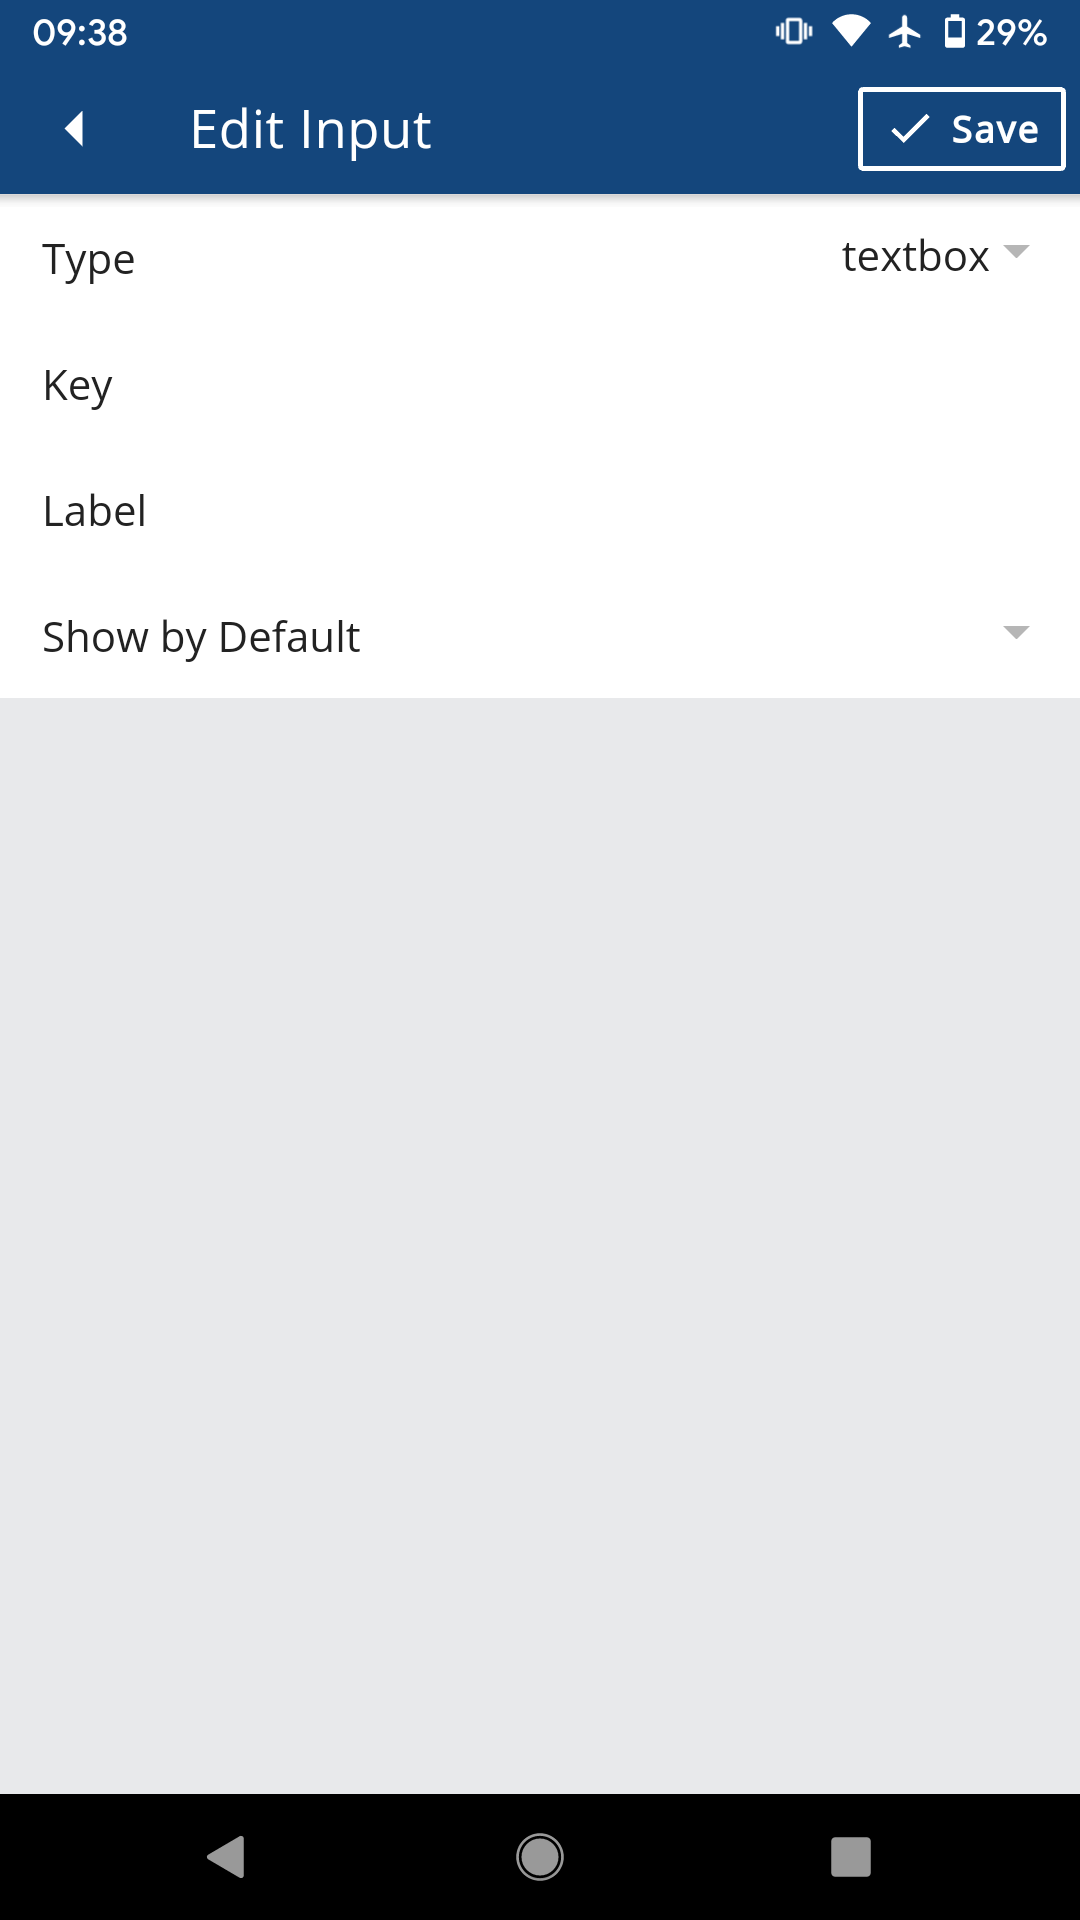
Select the textbox option and you will see two new fields Key and Label.
- Key: How the field will be referenced and stored in the database. This field is forced not to contain spaces.
- Label: How the field will be labeled in the Snapshot input form. This field can include spaces.
- Show by Default: If True, this input will be displayed when the user first enters the Snapshot. If False, this input will be displayed when the user selects Additional Inputs.
Set the following values for each field:
- Key:
fish_type - Label:
Fish Type - Show By Default:
True
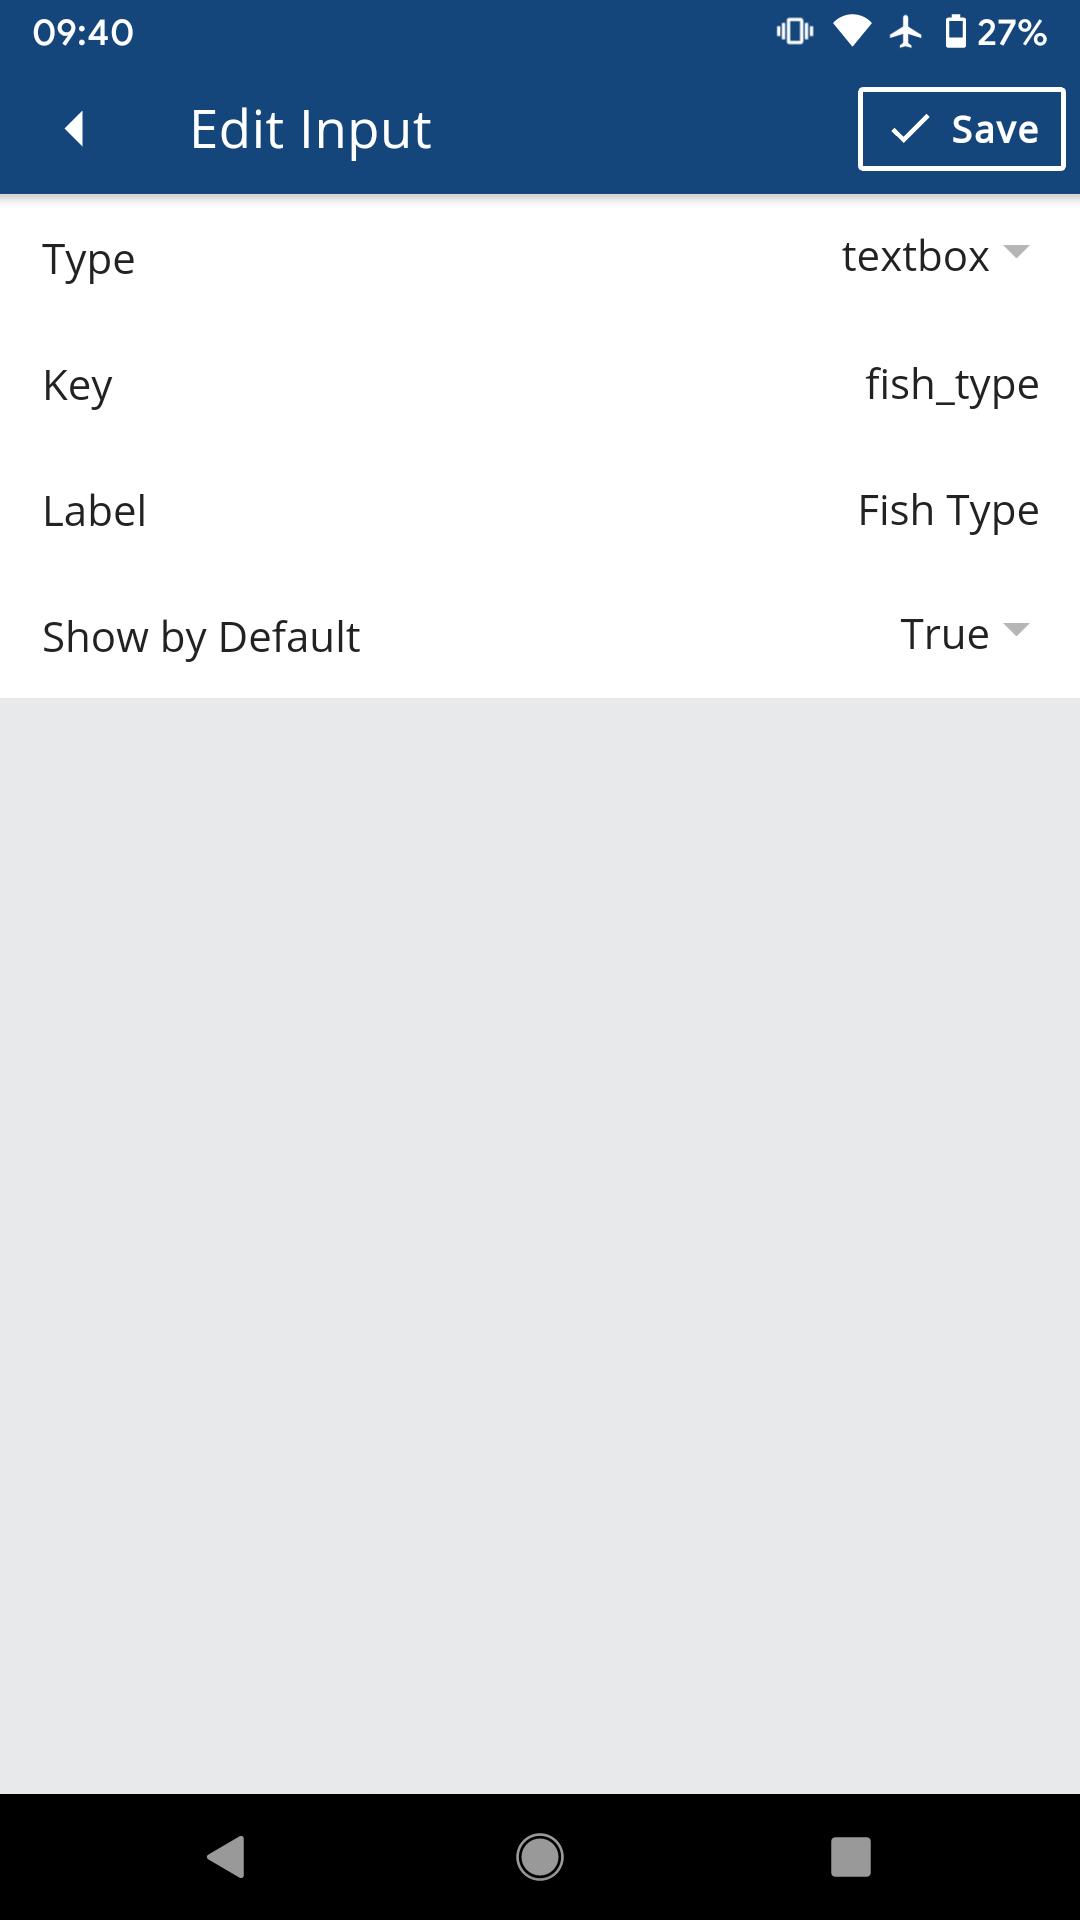
When finished, click Save in the upper right corner. The new input field will be added to the bottom of the list of inputs (scroll down to see it).
After adding an input, you must press the Save button in the top bar of the page to save changes. To discard any added inputs, press the Discard button in the top bar of the page.
Next we’ll create a Number field to note the length of a fish caught.
Press the green + Add button to open the new input field form and set the Type to number.
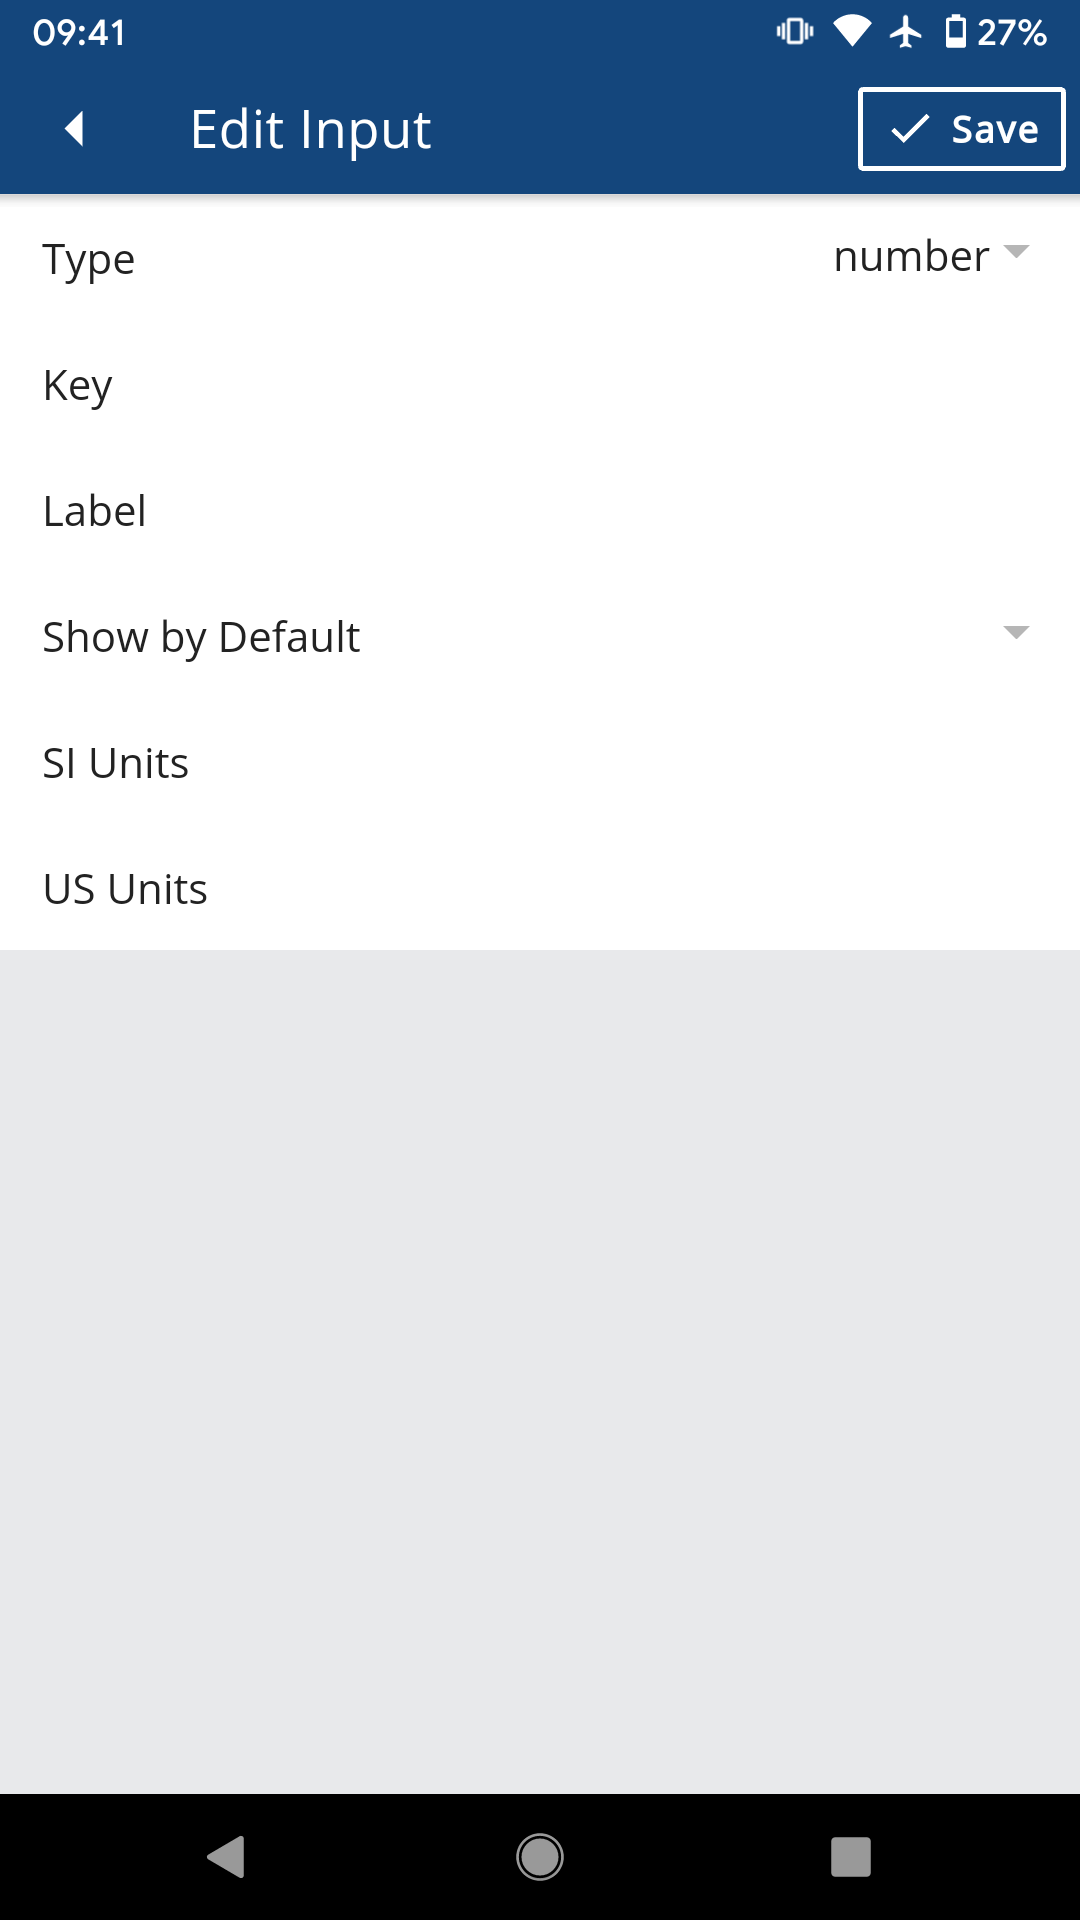
You will see four new fields Key, Label, SI Units, and US Units.
- Key: How the field will be referenced and stored in the database. This field is forced not to contain spaces.
- Label: How the field will be labeled in the Snapshot input form. This field can include spaces.
- Show by Default: If True, this input will be displayed when the user first enters the Snapshot. If False, this input will be displayed when the user selects Additional Inputs.
- SI Units: The SI units of the numeric field. Leave empty if units do not apply to this field. This must correspond to a string or string shorthand defined by mathjs.
- US Units: The US (English) units of the numeric field. Leave empty if units do not apply to this field. This must correspond to a string or string shorthand defined by mathjs.
See the Units topic for more information about unit handling in WeatherCitizen.
Set the following values to each field:
- Key:
fish_length - Label:
Fish Length - Show By Default:
True - SI Units:
cm - US Units:
in
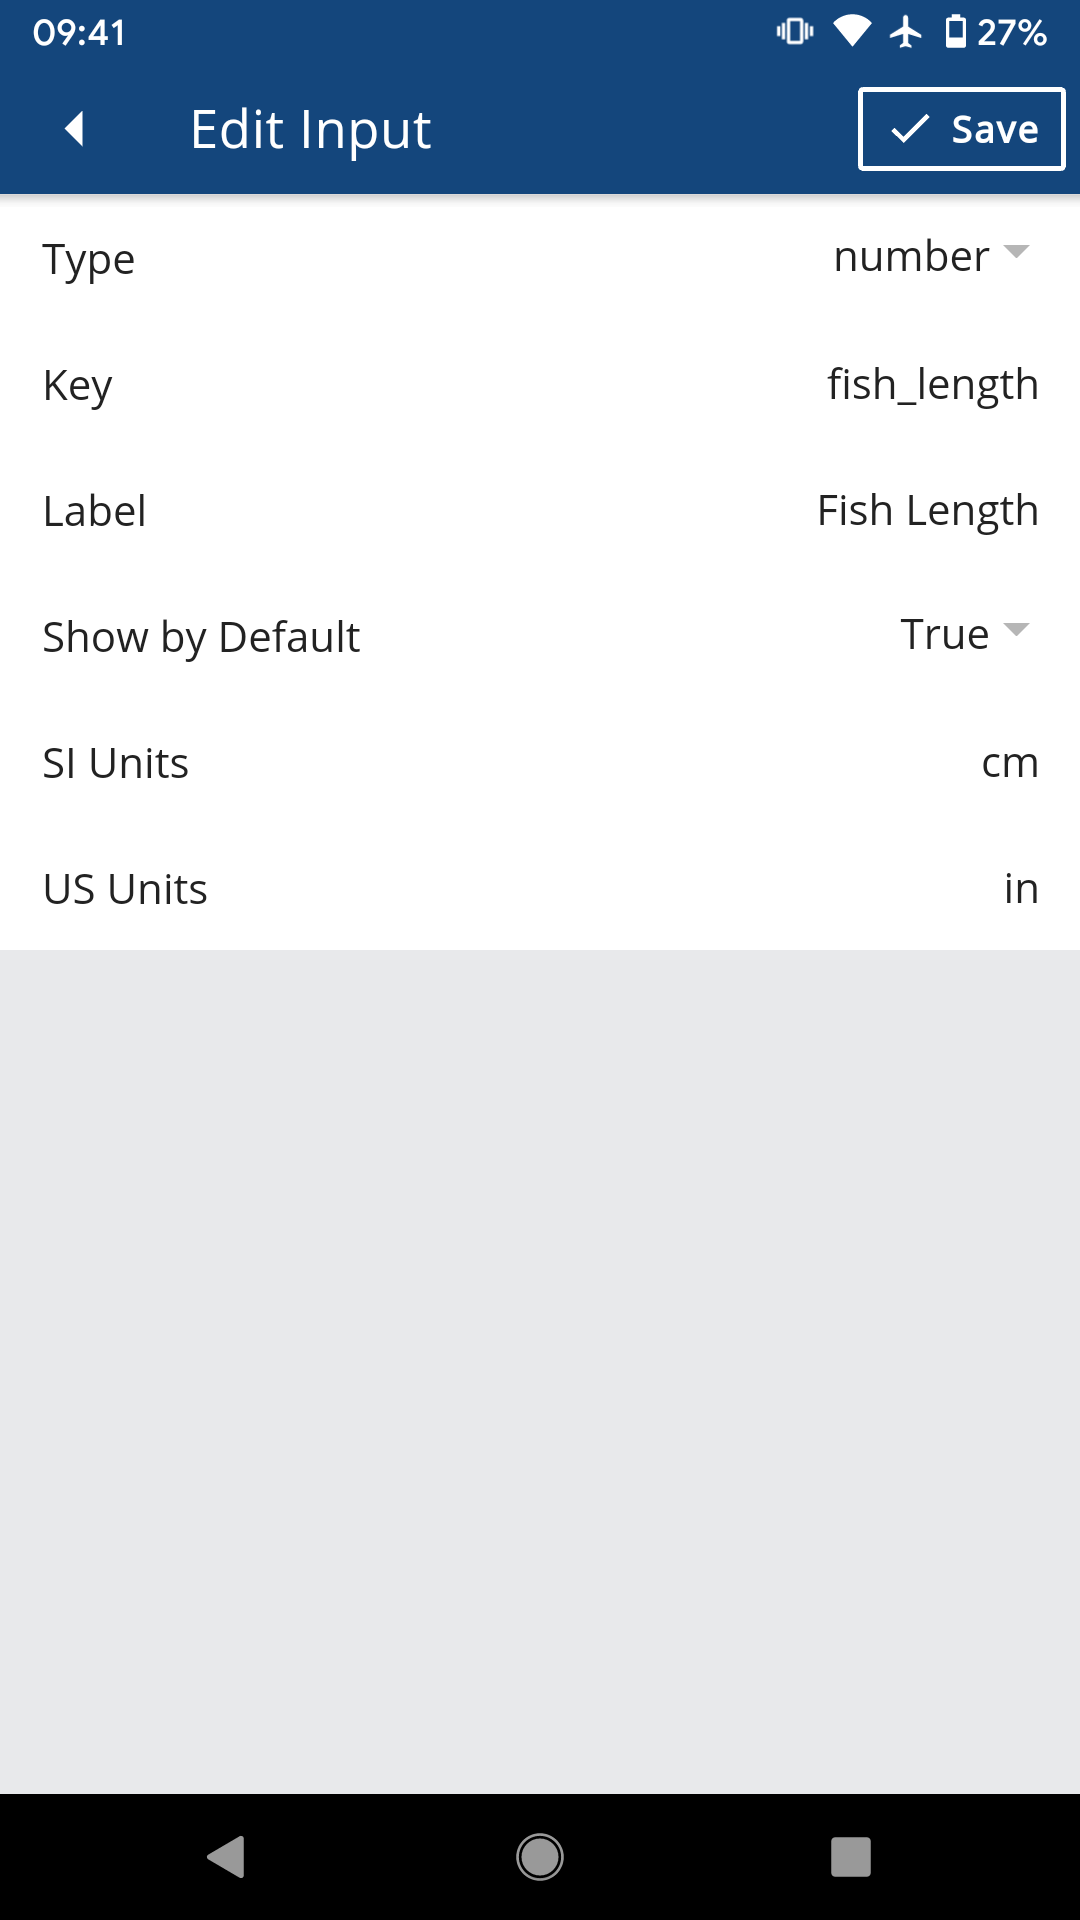
When finished, click Save in the upper right corner. The new input field will be added to the bottom of the list of inputs (scroll down to see it).
After adding an input, press the Save button in the top bar of the page to save changes. To discard any added inputs, press the Discard button in the top bar of the page.
Delete Input Fields
Items can be removed from the input form using the trash can on the right side of the item. Press the trash can to delete an item from the input form.

To streamline our fish tracking form, delete all inputs except photo, Notes, Fish Type, and Fish Length.
To discard any changes, press the Discard button in the top bar of the page. After making any changes, press the Save button in the top bar of the page.
To revert back to the default input list from when the app was first installed, press the red Defaults button at the top of the input fields. This will delete ALL the custom inputs. After reverting to defaults, you must press the Save button in the top bar of the page. To discard the reversion, press the Discard button in the top bar of the page.
Edit Input Fields
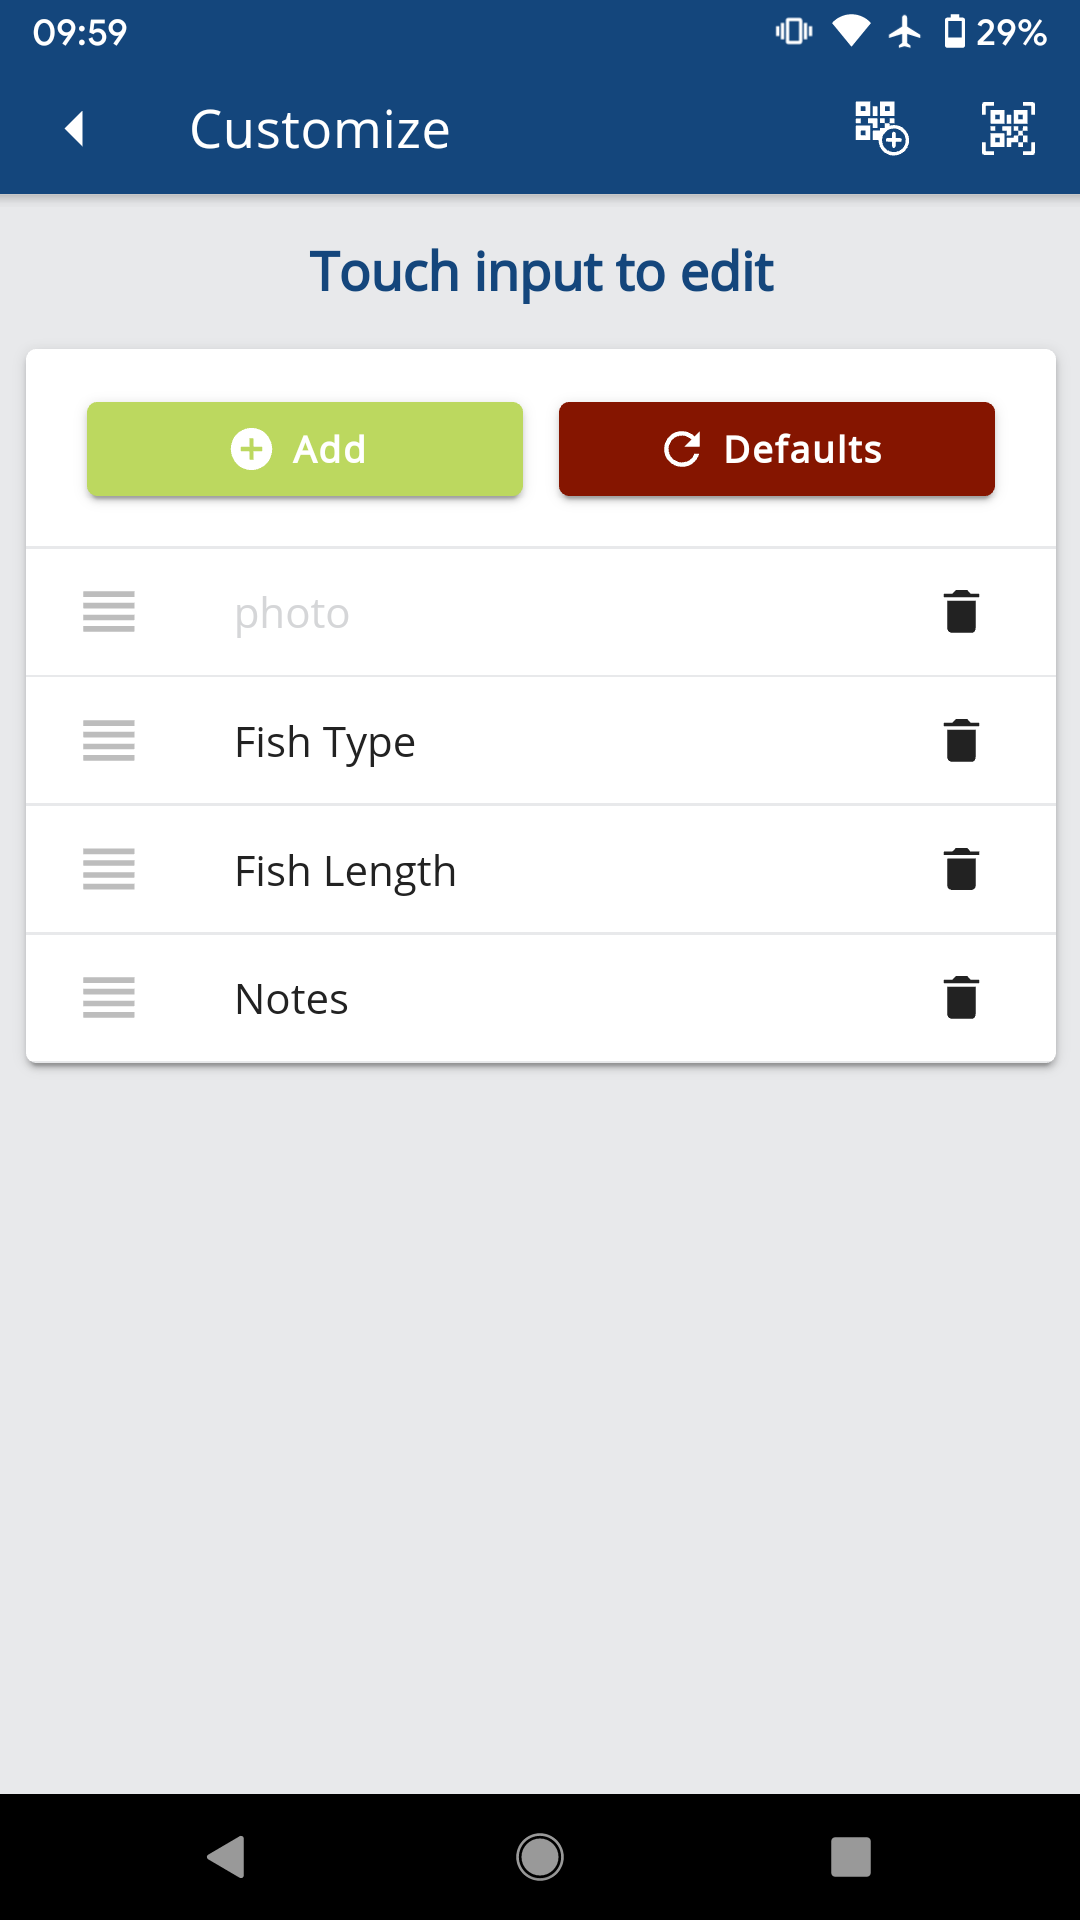
Reorder
Items can be reordered using the bars on the left side of the item. Press, hold, and slide the left bars to move an item up or down in the input form.
Reorder the current inputs to be in the order photo, Fish Type, Fish Length, and Notes.
Edit
Items can be edited by pressing on the item. Items with grey text (i.e., photo, audio) do not have any editable properties and therefore can’t be edited. Press on any item with black text to edit the properties of the input field.
After making changes, press the Save button in the top bar of the page. To discard any changes, press the Discard button in the top bar of the page.
Share Input Form
Once you have customized your input form, you can share your input form with others through a barcode. Make sure your changes are saved by pressing the Save button in the top bar of the page.
After the input form is saved, you will see two barcode icons in the top bar. Press the left barcode icon to create a barcode based on your current input form. The barcode may take a few moments to generate.
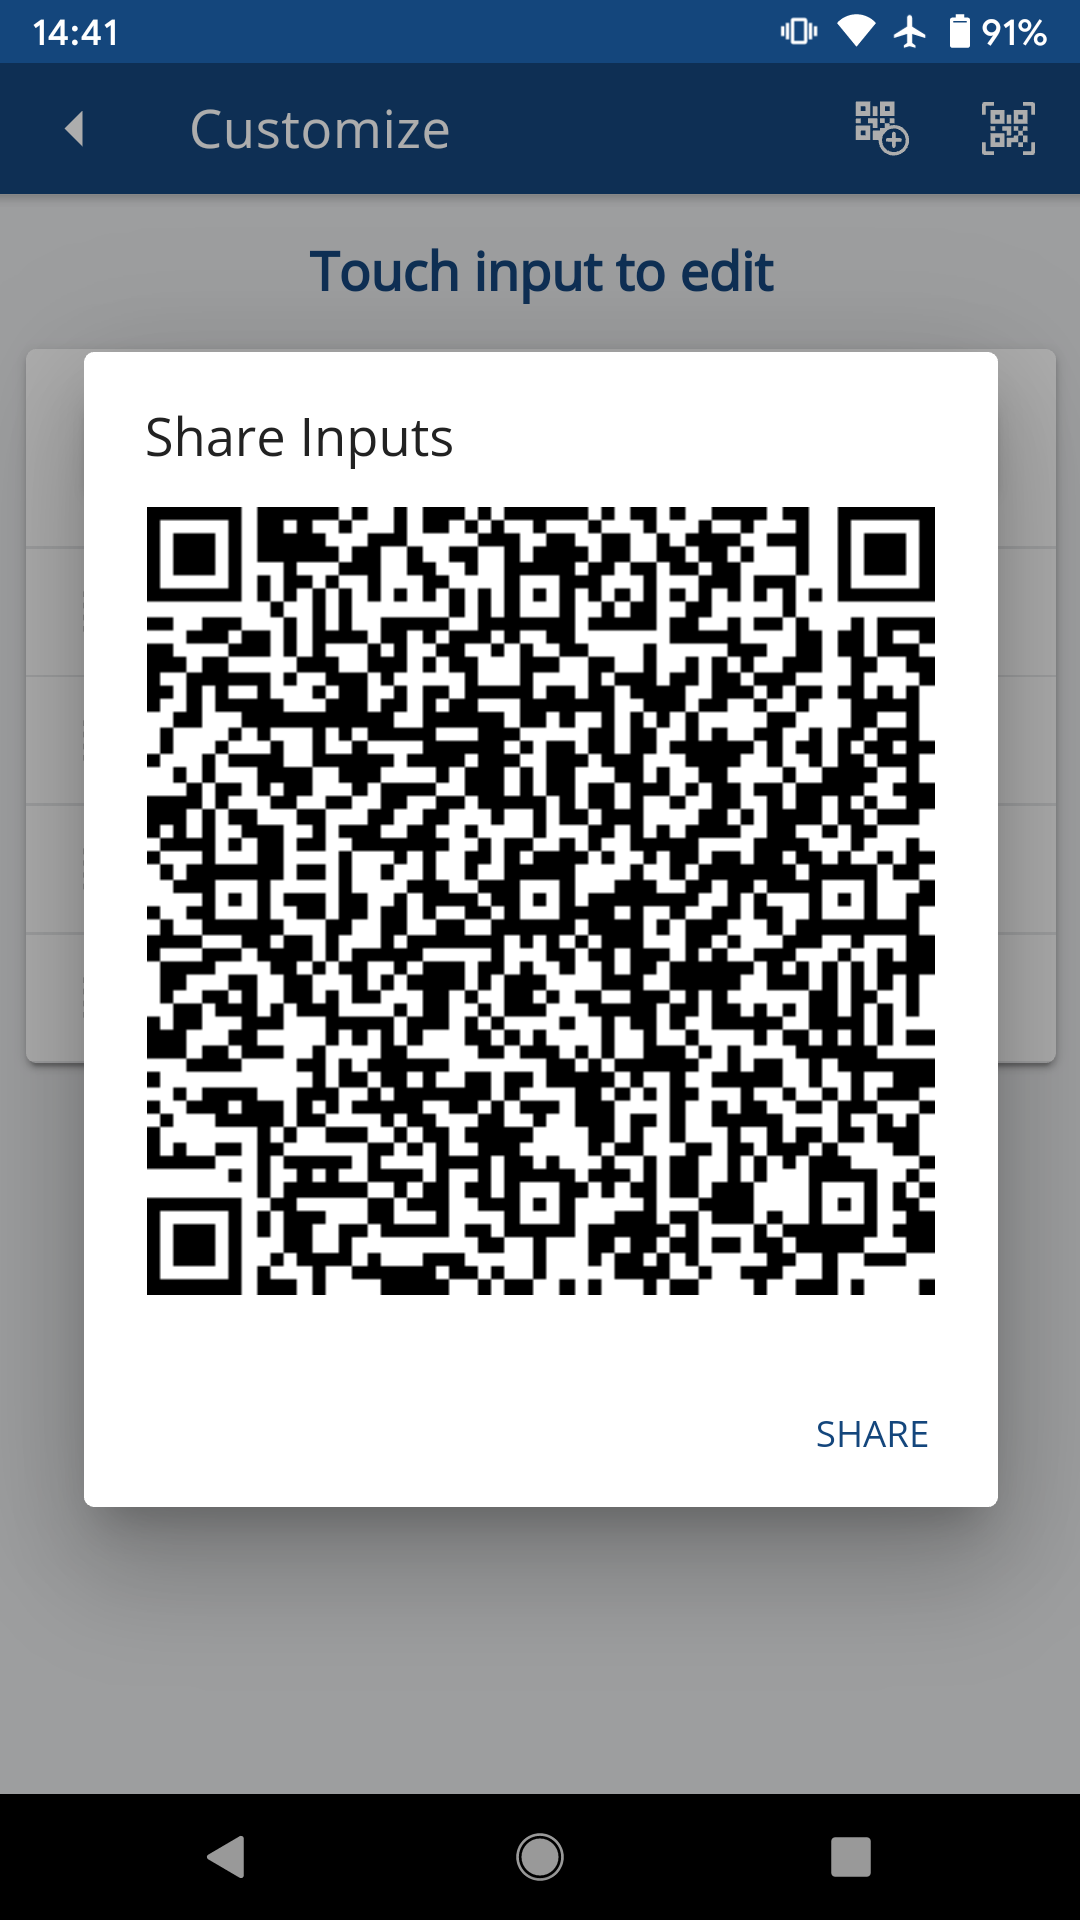
Once the barcode is generated, press the Share button to share the barcode with others via text, email, or social media.
Load Input Form
After receiving a QR code from another WeatherCitizen user, navigate to the Customize Snapshot Inputs page.
You will see two QR code icons in the top bar.
Press the right QR code icon and you will open a QR code scanner using the camera.
Note: if this is the first time you are using the camera through WeatherCitizen, you will need to allow WeatherCitizen permission to access the camera.
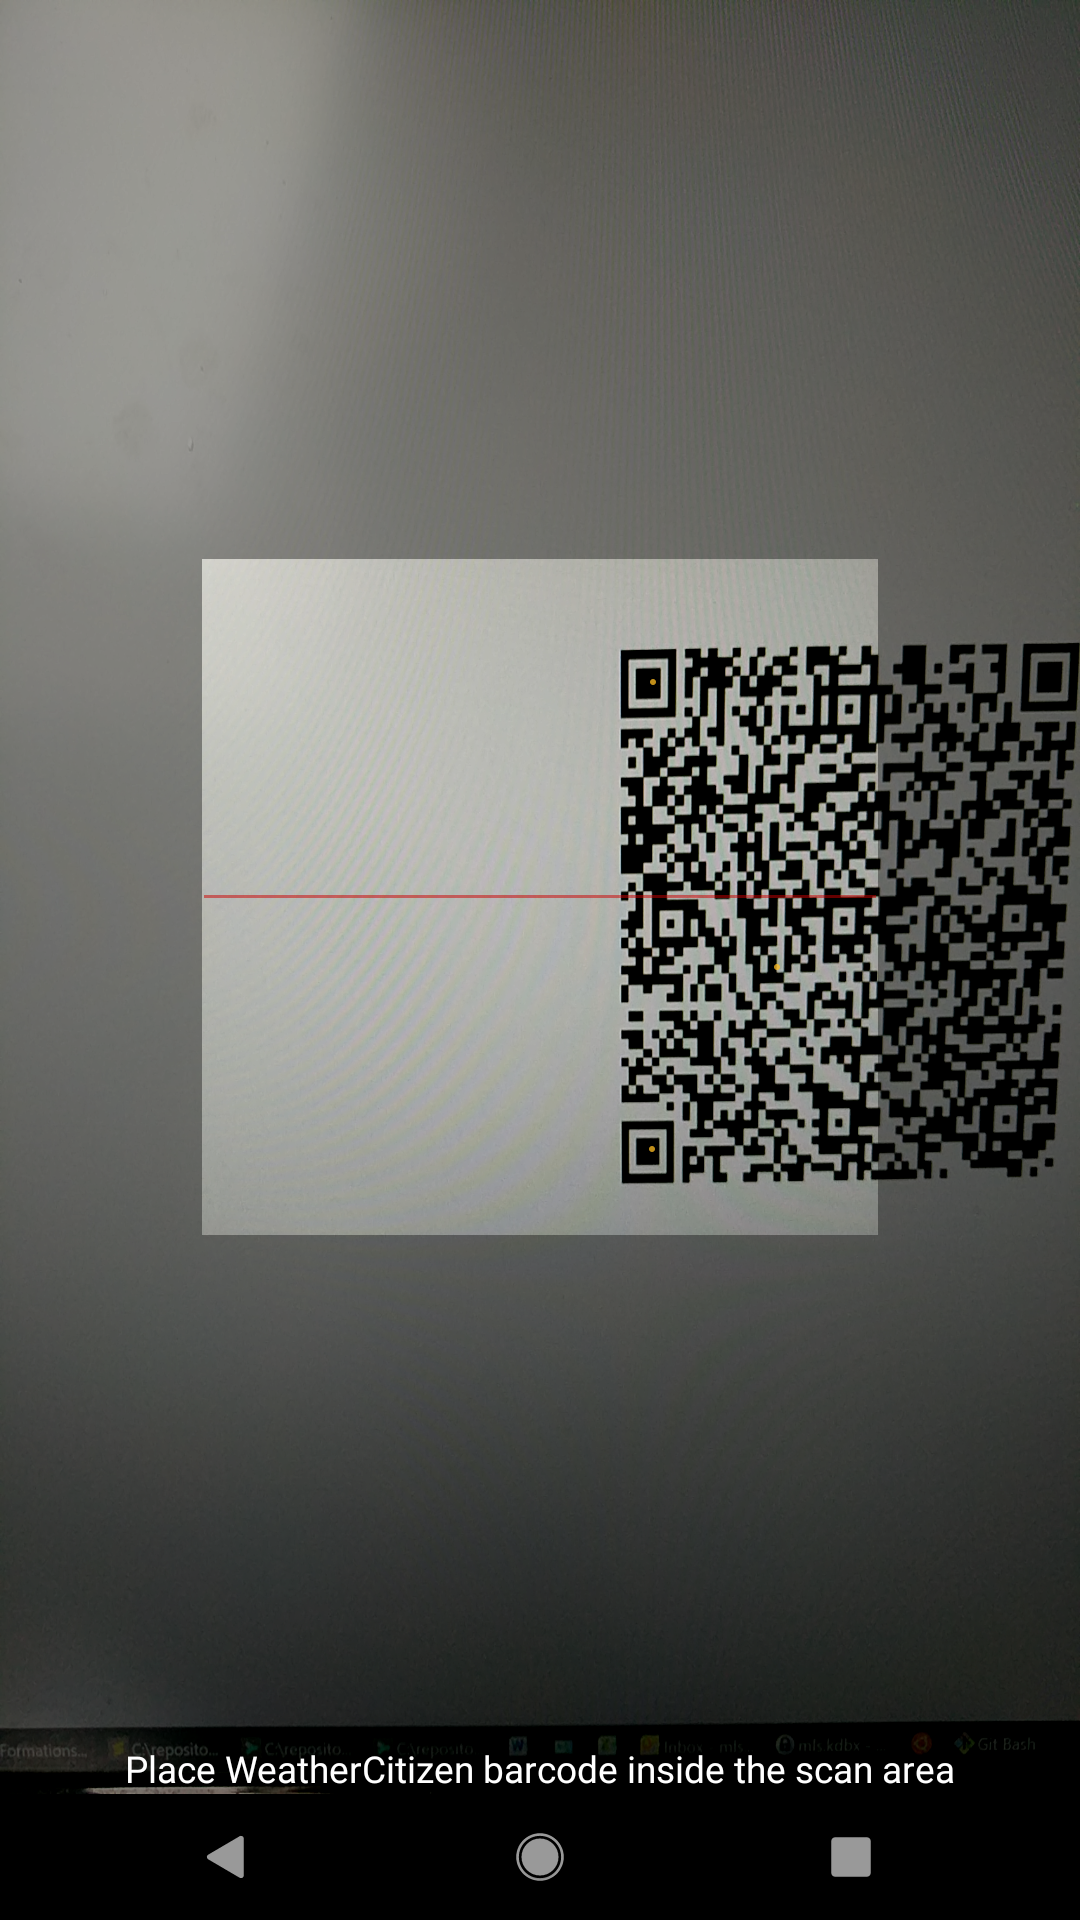
Point the camera at the QR code and make sure the QR code is completely within the boundaries of the scanner. When the QR code is scanned successfully, the screen will momentarily show three green dots, then tranfer you back to the Customize Snapshot Inputs page.
Press the Save button in the top bar of the page to save the changes generated by the QR code.