Configure
WeatherCitizen enables you to customize data collection settings, user profile information, and reminders for making observations. The guides below describe how to configure these app capabilities to best support your usage.
Data Sharing: The Upload Records option on the Settings page controls data upload and sharing. Please review this setting if you would like to limit data sharing from the app. See Data Collection & Sharing for information about what data is uploaded and shared.
Settings
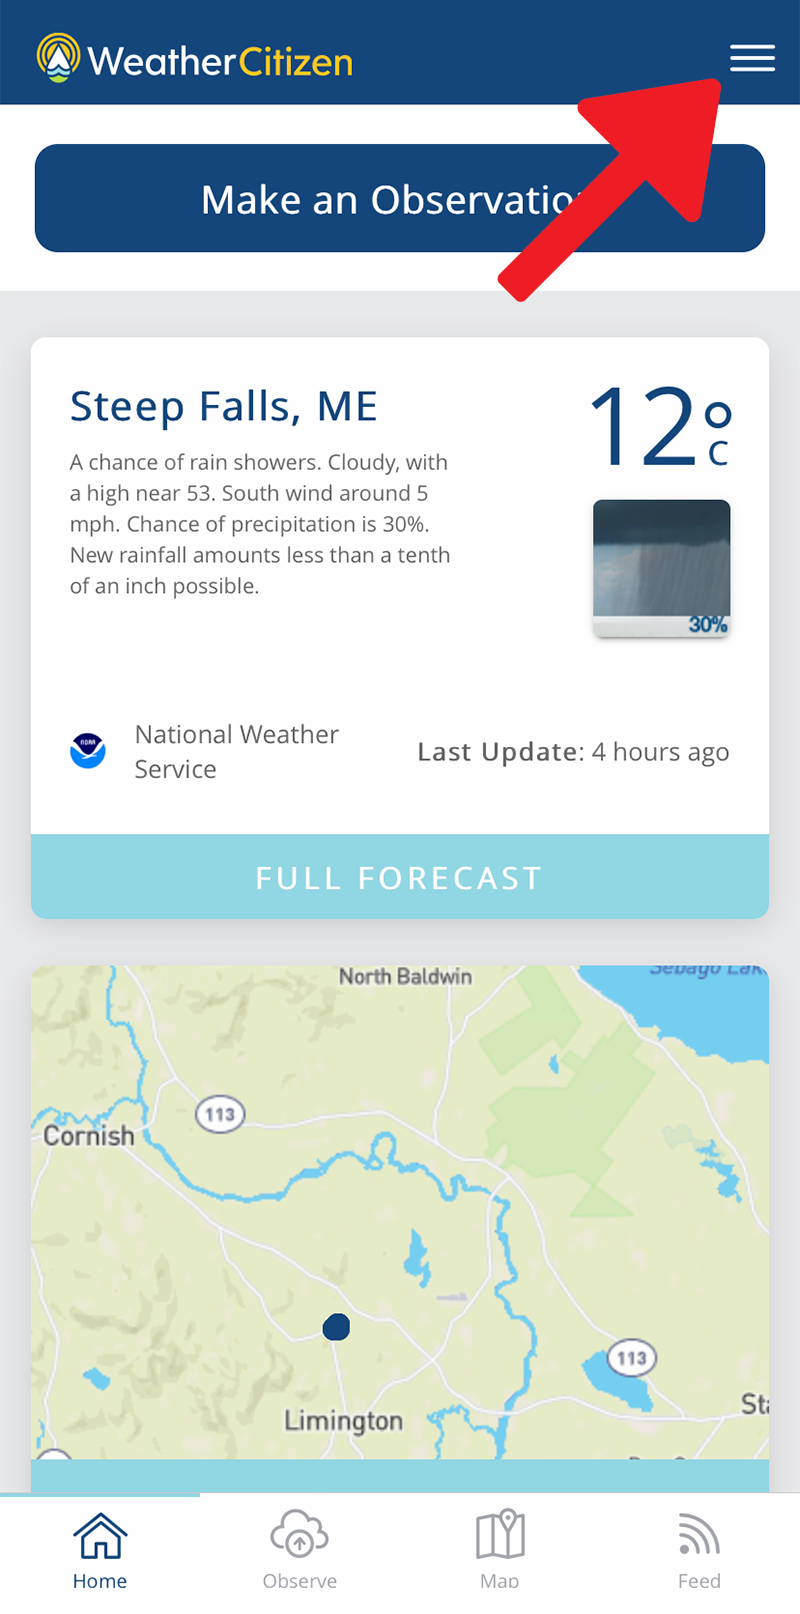
This section will describe how to configure the app settings of WeatherCitizen. The app settings are accessed through the side menu of the app. Press the  icon in the top right of the app and select the Settings menu item.


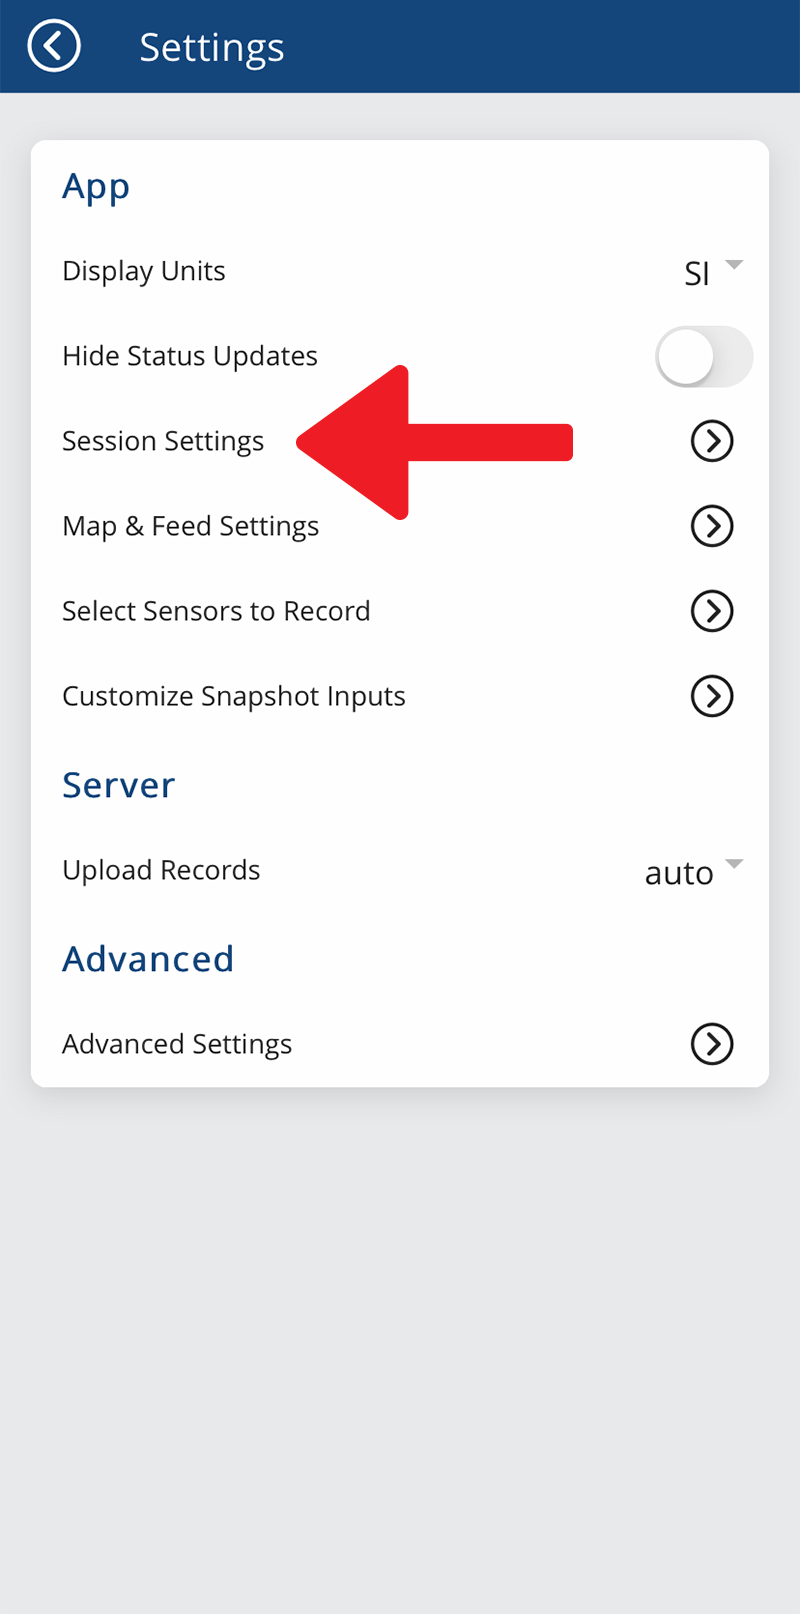
Configure the general app settings on the root of the Settings page:
- Display Units: Select the units to use for all values displayed throughout the app. By default, this is set to SI (m, kg, s). The US option sets the units to British/US units (ft, lbs, s). Note that the units of all stored data is always SI. More information on units used throughout the app is provided in the Units section.
- Hide Status Updates: Toggle this option to hide the pop up status messages that present in the bottom of the app.
- Upload Records: Select your preference for sharing collected data collected with the public WeatherCitizen server. By default, this option is set to auto, which will automatically upload observations to the server when a network connection is available. Select Manual to manually upload observations through the side menu or the Advanced Settings page. Select Never to never upload observations to the server. When this option is set to never, collected observations will still be stored locally and can be exported to a local JSON or CSV file from the Advanced Settings menu.
Session Settings
Select Session Settings from the root of the Settings page. This page allows you to configure the parameters of Session Observations.
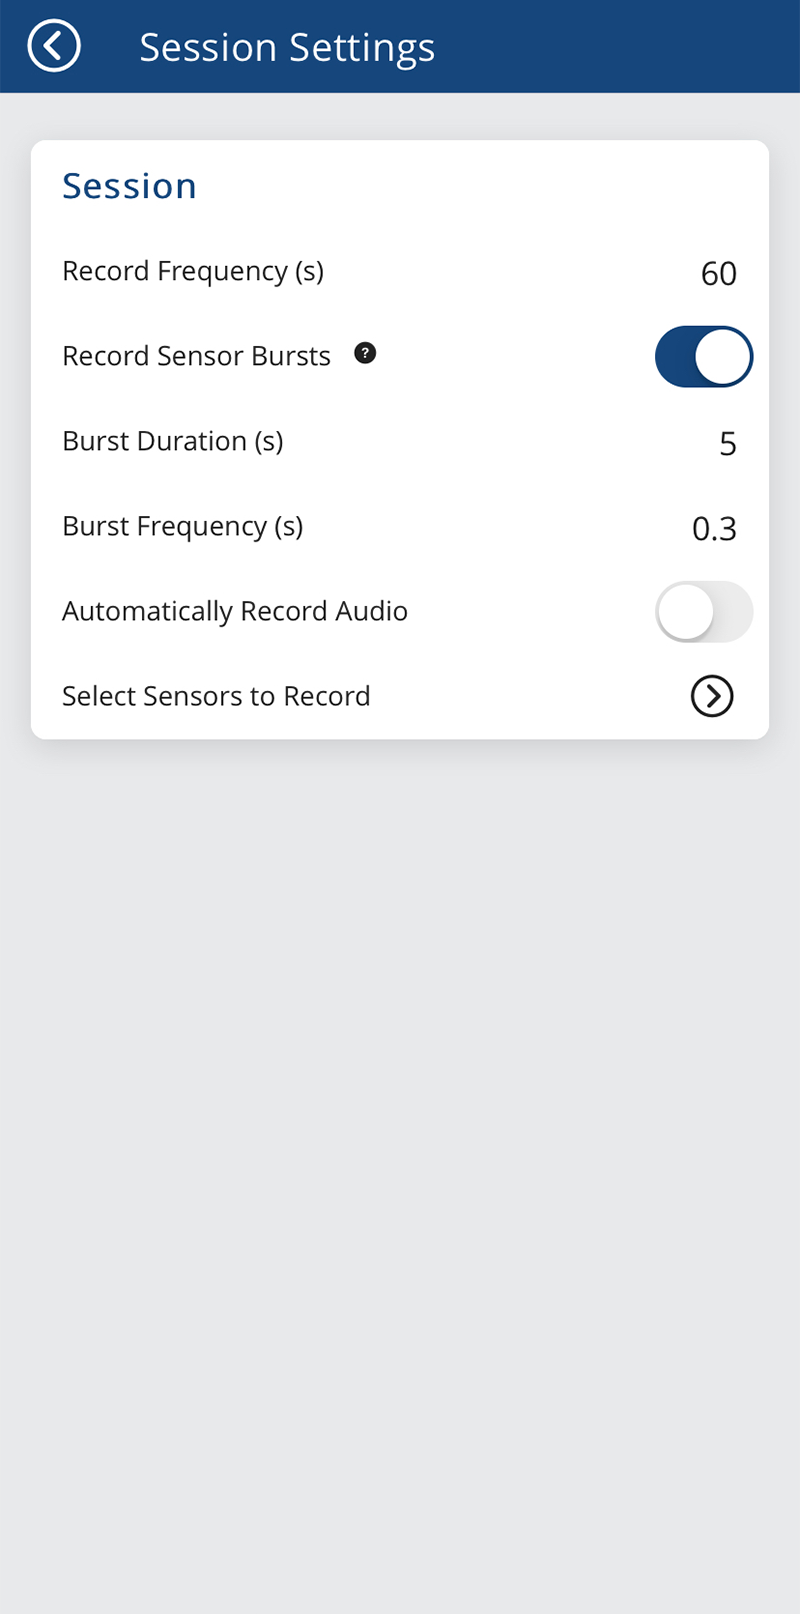
Configure the settings for Session Observations:
- Record Frequency: Select the frequency to record device sensor values during a Session. Geolocation and device sensors will be recorded at this frequency, in seconds.
- Record Sensor Bursts: Toggle this option to record a short burst of high frequency sensor data each time data is collected at the Record Frequency. See Sensor Bursts for more information.
- Burst Duration: If Record Sensor Bursts is enabled, this sets the total length of the sensor burst recording, in seconds. The maximum Burst Duration is set by the Record Frequency.
- Burst Frequency: If Record Sensor Bursts is enabled, this sets the rate of data collection during a sensor burst. The minimum rate for the burst frequency is 0.1 seconds (10 Hz).
- Automatically Record Audio: Toggle this option to record a short audio file each time data is collected at the Record Frequency. This option will automatically record audio in the background and upload that audio to the server. Please use with caution.
- Audio File Length: If Automatically Record Audio is enabled, this sets the total length of the audio file, in seconds. The maximum audio file length is 10 seconds.
Map & Feed Settings
Navigate to the root Settings page and select the menu item Map & Feed Settings.
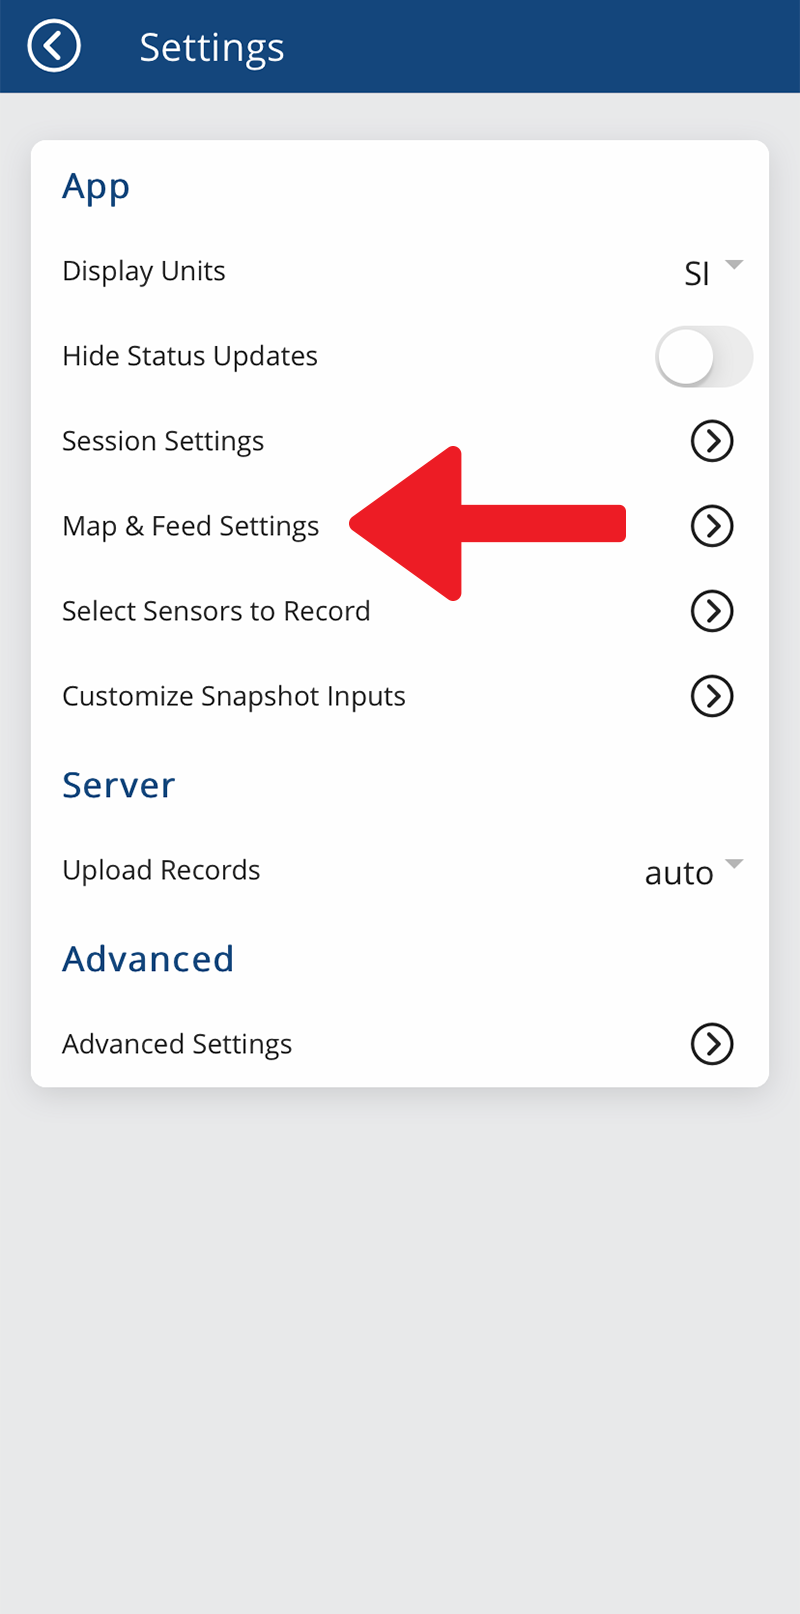

Configure the settings for Map & Feed:
- Max Age: Select the oldest observations, in hours, to display on the map or feed.
- Auto Refresh: Select a time interval to automatically refresh the map and feed. The map and feed will be refreshed each time the page is opened.
- Sort By: Select Newest to put the most recent observations at the top of the feed. Select Nearest to put the closest observations at the top of the feed.
- Max Distance: Sets the maximum distance of observations loaded into the feed based on the current location.
The Observation Details options control the summary display below the map when a map observation is selected.
- Show Device Sensors: Display sensor values in the observation summary.
- Show Input Fields: Display input values in the observation summary.
- Show Bluetooth Devices: Display bluetooth device values in the observation summary.
Select Sensors to Record
Navigate to the root Settings page and select the menu item Select Sensors to Record.
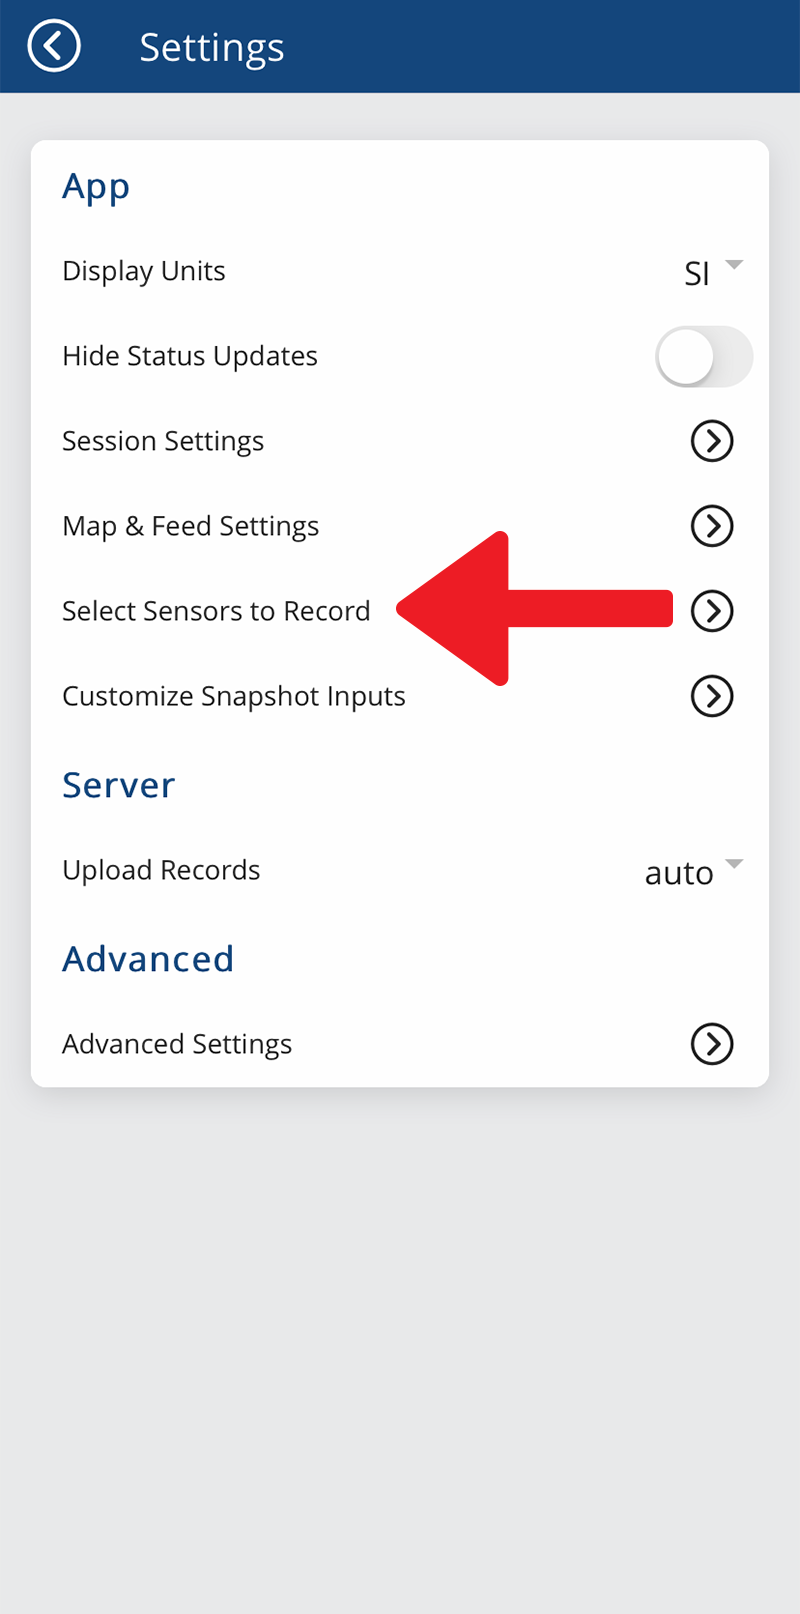
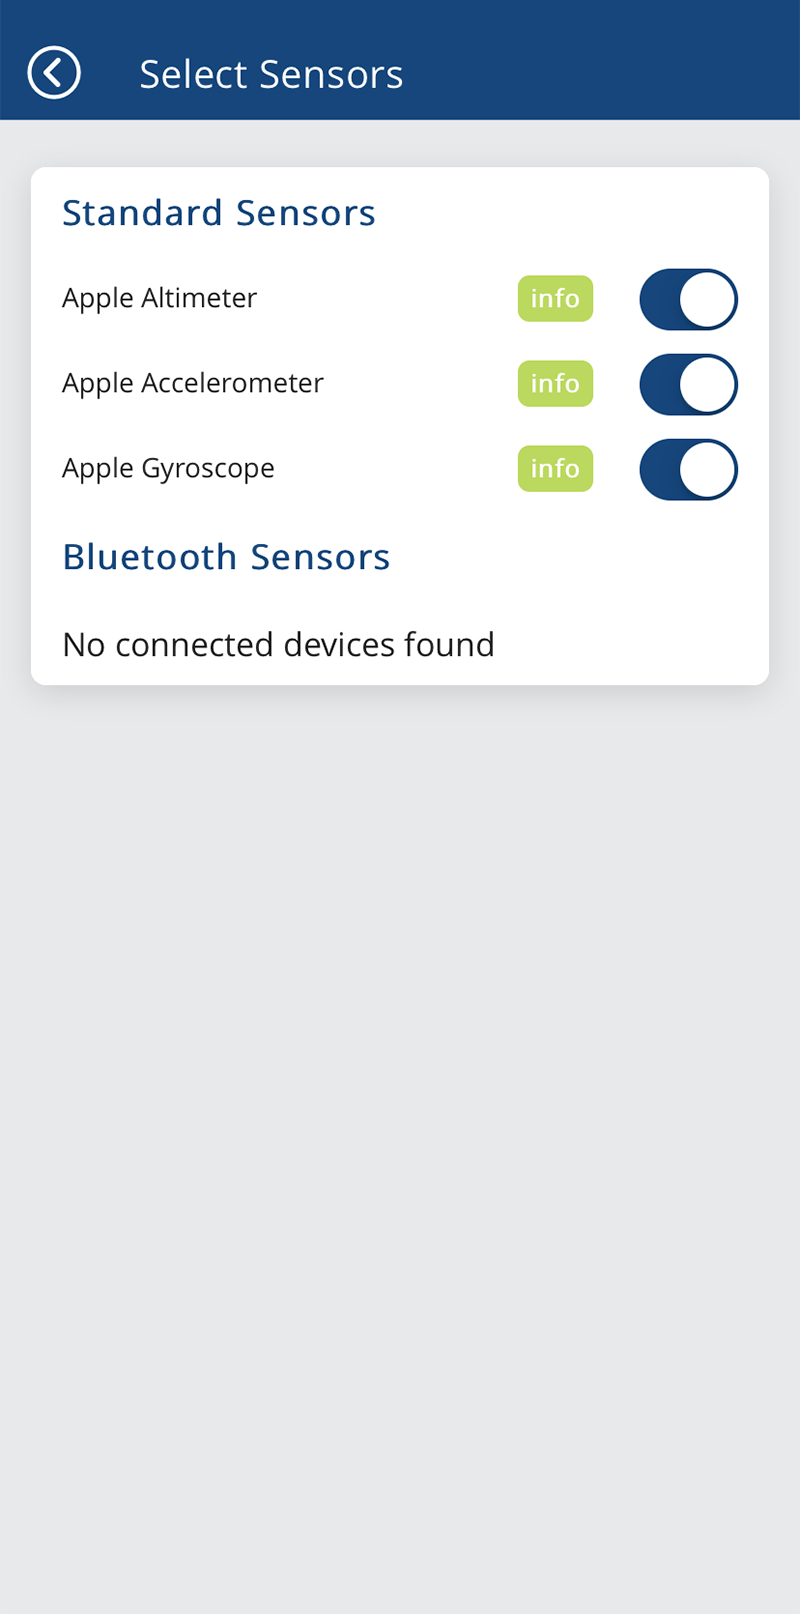
The Select Sensors settings menu enables you to select which device sensors are recorded during Session and Snapshot observations. By default, WeatherCitizen enables the following device sensors (if they exist on the device):
- Pressure
- Ambient Temperature
- Light
- Relative Humidity
- Accelerometer
- Magnetic Field
- Orientation
- Gyroscope
- Gravity
- Linear Acceleration
- Rotation Vector
Toggle the switch next to the sensor to enable or disable this sensor during data collection.
WeatherCitizen supports specific sensor types (i.e., Pressure, Light) that enable the app to handle the units and labels for the sensors. These sensors are listed under Supported Sensors on this page.
Most devices will contain additional sensors which WeatherCitizen does not know how to interpret. These sensors will be listed in the Additional Sensors section of the page. You can enable these sensors for observation, but no units or labels will be associated with the data.
Customize Snapshot Inputs
This settings page allows you to customize and share the Snapshot observation form. This feature is covered in the tutorial Customize Snapshot Inputs.
Profile
This section will describe how to configure the user profile in WeatherCitizen.
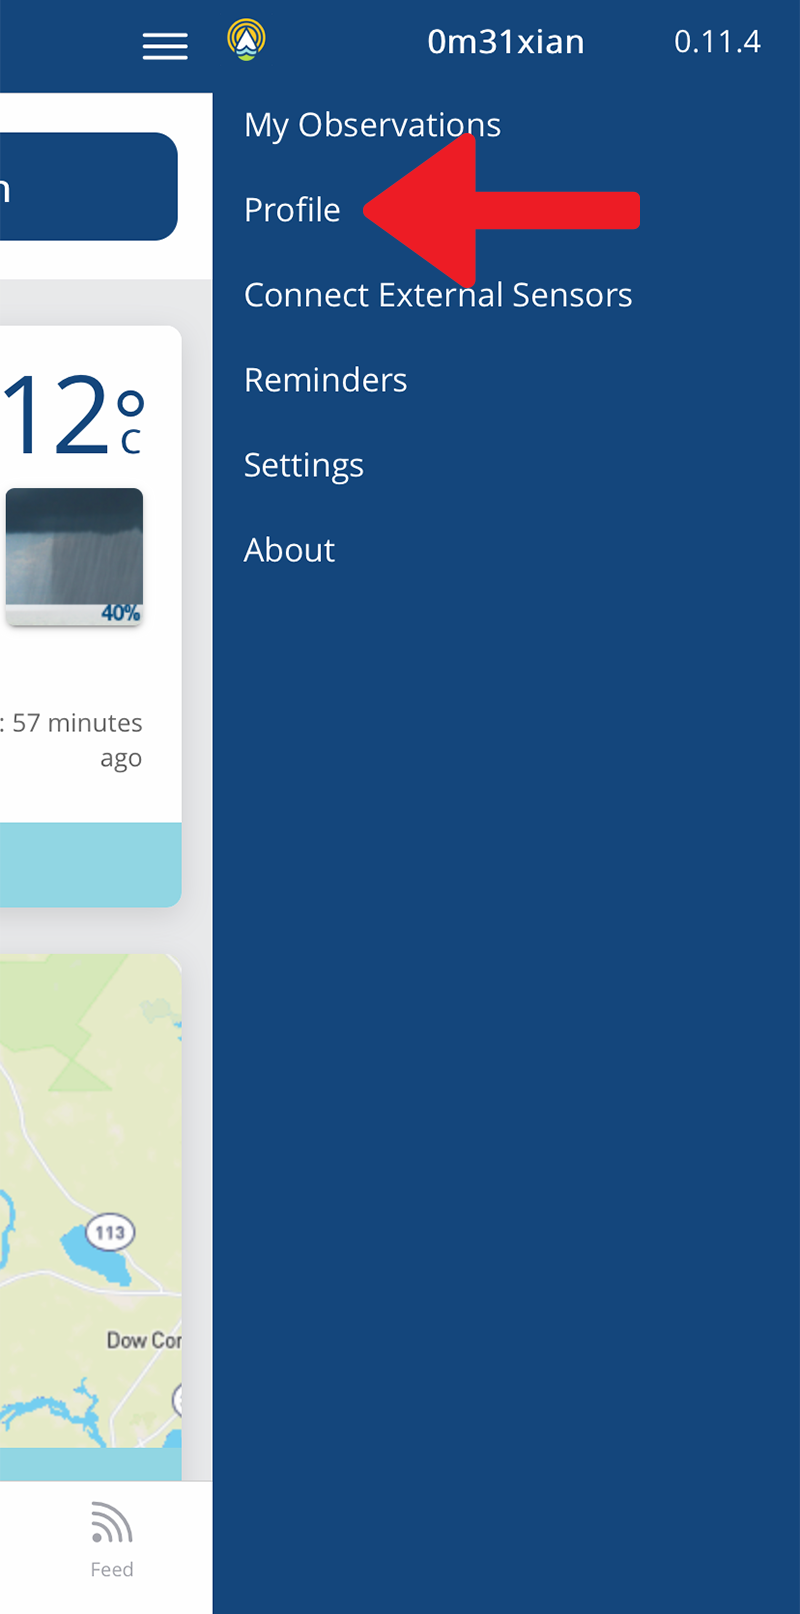
Your profile is accessed through the side menu of the app.
Press the icon in the top right of the app and select the Profile menu item.
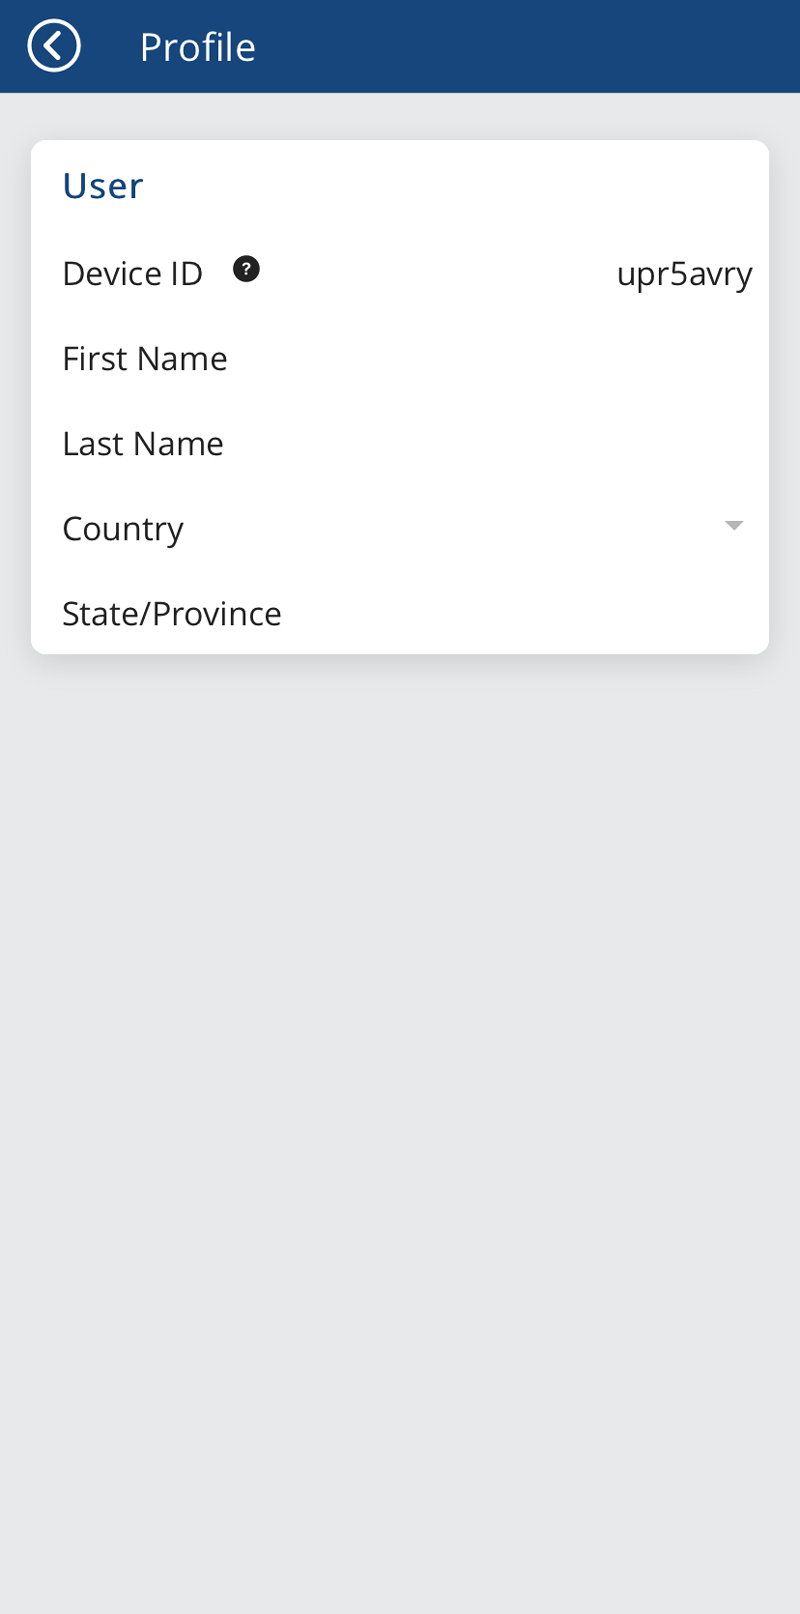
On the Profile page, you will see your WeatherCitizen Device ID and a set of empty profile fields. The Device ID is randomly assigned when the app is first loaded to allow observations from a single device to be aggregated over time. The Device ID is constant and can only be changed by reinstalling the app.
All other profile fields are optional. See the Device Record section of the Data Model document for information about how profile information is stored in relation to recorded data.
Reminders
This section will describe how to add reminders to make observations in WeatherCitizen.
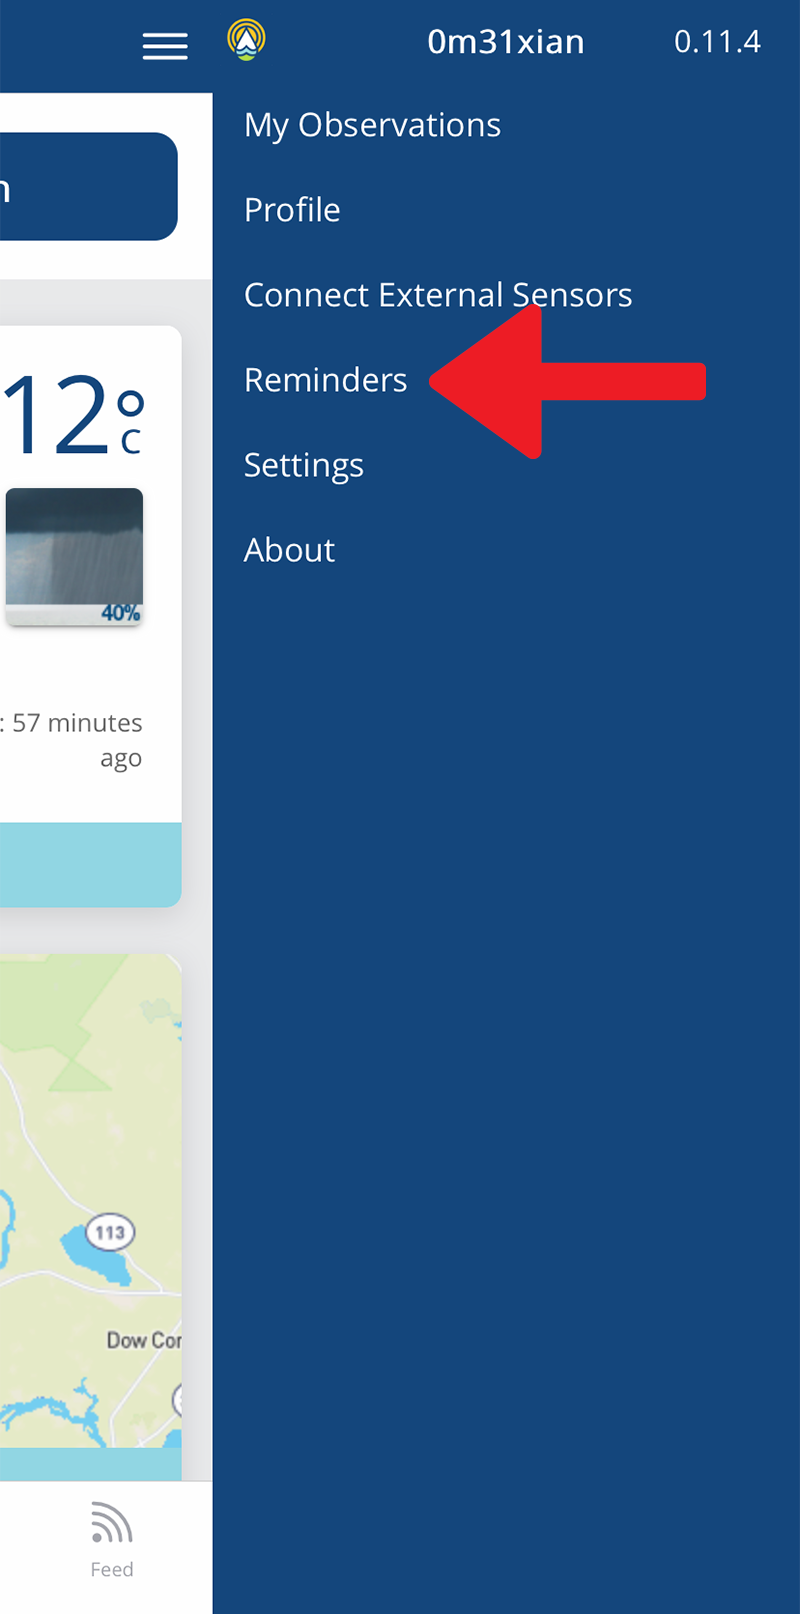
Reminders are accessed through the side menu of the app.
Press the icon in the top right of the app and select the Reminders menu item.


On the Reminders page, press the large green button with the text + Add. By default, the reminder will push a notification outside of the app to Take a Snapshot every day at 2 PM local time.
The toggle switch to the right of the reminder enables/disables the out-of-app notifications for the reminder. To edit the reminder, select the down arrow in the bottom right side of the reminder.
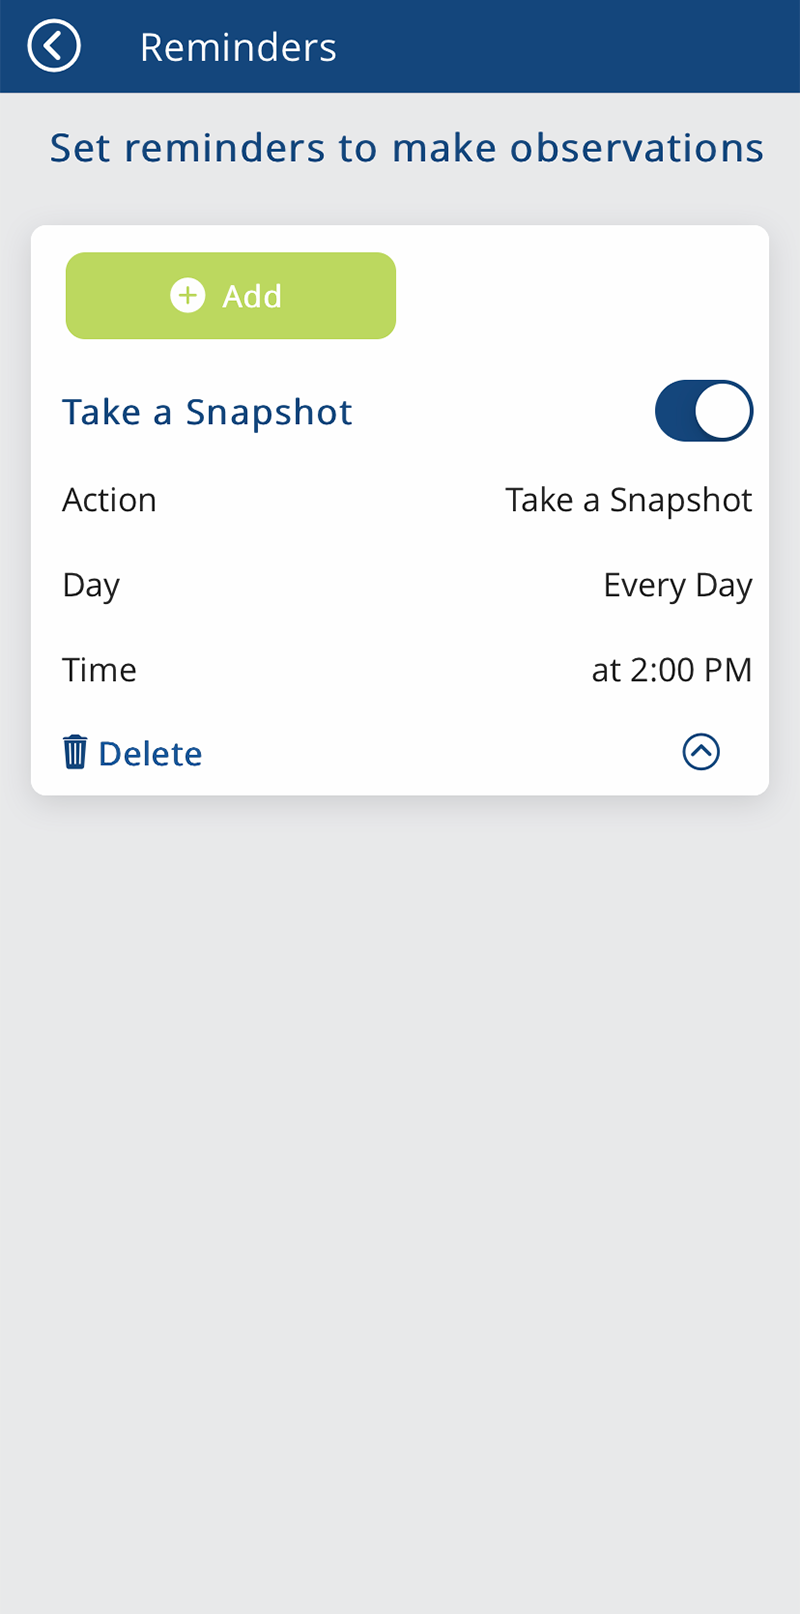
- Action: In the overlay screen, select the type of observation to be reminded to perform, either Take a Snapshot or Record Session. Press the Save button in the top right of the overlay to save the action selection to the reminder.
- Day: In the overlay screen, select the day for the reminder to be active. You can select Every Day for the reminder to be active every day, or you can select specific days of the week for the reminder to be active. Press the Save button in the top right of the overlay to save your day selection to the reminder.
- Time: In the overlay screen, select the time of day (on each Day selected) for the reminder to fire the notification. You can select a single time of day for one notification, or specify a time interval to push notifications multiple times a day. Press the Save button in the top right of the overlay to save your time selection to the reminder.